A system image, as the name suggests, is the image or what you can call a complete copy of the current state of your computer’s hard disk (or any of its partitions). It would include all the system settings, files and the Windows configuration.
You could use a system image to recover your data and computer settings in case of a hard drive crash. However, keep in mind that you cannot restore individual files or settings with this process. It would always be a complete recovery. Hence, it is recommended that you also keep backing up files and folders individually instead of just relying on this system image as your ultimate savior.
In this article, we’ll see how we can create a system image in Windows 7 systems using the backup and restore center. We’ve already introduced it in a previous article ( the article we linked to in the above paragraph ). Lets dive further into its settings.
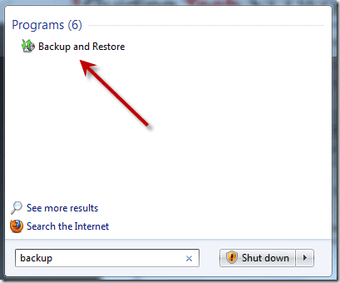
1. To start with, type backup in the start search bar and you’ll see Backup and Restore showing up in the results. Click on it.
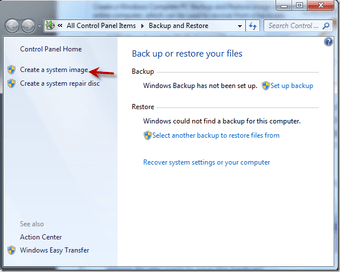
2. On the Backup and Restore Center window, on the left, you’ll find a link that says Create a system image. Click on it.
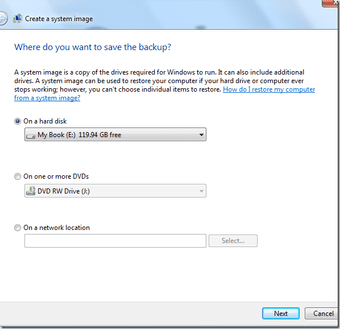
3. You can backup the system image on an external drive, on DVDs or on a different computer in the network (if that’s an option). You could even back it up on a separate partition on the same hard disk, but that’s not recommended for obvious reasons.
It’ll automatically detect the most appropriate location to back it up. Like, in the following screenshot, you can see that it detected my external hard drive that was plugged in already.
4. Next, you have to select the drives you want to back up.

5. It’ll confirm the settings you selected before it starts creating the image. It also shows the amount of space the image is likely to occupy.
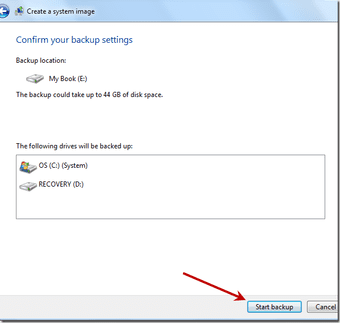
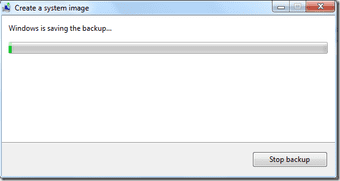
6. Once you hit Start backup, it starts creating the image. Depending on the amount of data you have, it could take anywhere between a few seconds to an hour or two.
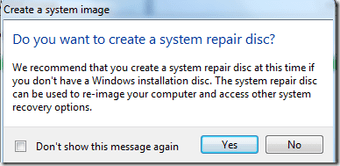
7. Once it’s done creating the image, it’ll ask you if you want to create a system repair disc, which you should go ahead and create.
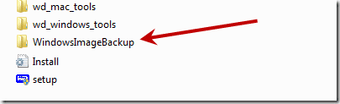
You’ll find the system image folder named as WindowsImageBackup in the location where you saved it ( Yes, you don’t get to choose a folder or a directory…you can only choose the drive where you want to save the image ).
So that was how you create a system image in Windows 7. In Vista systems, the process is almost the same except a few changes in the interface.
If you run a Home or Basic version of Windows Vista/Windows 7 then you won’t find the backup and restore thing, and can’t use what we’ve discussed. But don’t worry, we’ll soon come up with an article that will showcase some useful third party tools to create a system image.
Last updated on 07 February, 2022
The above article may contain affiliate links which help support Guiding Tech. However, it does not affect our editorial integrity. The content remains unbiased and authentic.
Read Next
 Create Bootable Windows ISO Image from Extracted Files
It happened to me one day while I was helping my friend with Windows 8 installation.
Create Bootable Windows ISO Image from Extracted Files
It happened to me one day while I was helping my friend with Windows 8 installation.
 How to Create a Custom Recovery Image of Windows 8.1
Windows 8’s Refresh your PC feature is very useful in times when Windows is not working properly or not booting at all.
How to Create a Custom Recovery Image of Windows 8.1
Windows 8’s Refresh your PC feature is very useful in times when Windows is not working properly or not booting at all.
 How to Create Bootable Windows 8 USB Drive from ISO Image
We saw yesterday how you can install and test the latest Windows 8 build on your system as a virtual operating system using Oracle VirtualBox. For those who haven’t heard, the
How to Create Bootable Windows 8 USB Drive from ISO Image
We saw yesterday how you can install and test the latest Windows 8 build on your system as a virtual operating system using Oracle VirtualBox. For those who haven’t heard, the
 How to Put Image or Text On Top of Another Image in Google Docs
Apps like Microsoft Word, Google Slides, etc., let you overlap images or text over another image without any fuss.
How to Put Image or Text On Top of Another Image in Google Docs
Apps like Microsoft Word, Google Slides, etc., let you overlap images or text over another image without any fuss.
 How to Quickly Create QR Codes with Google Image Chart Editor
Somehow, QR Codes remind me of an undecipherable jigsaw puzzle.
How to Quickly Create QR Codes with Google Image Chart Editor
Somehow, QR Codes remind me of an undecipherable jigsaw puzzle.
 How to Use Bing Image Creator to Create Cool AI Images
There's no doubt that AI is here to stay.
How to Use Bing Image Creator to Create Cool AI Images
There's no doubt that AI is here to stay.
 5 Best Ways to Fix Bad Image Error on Windows 10 and Windows 11
If you are experiencing a bad image error, you likely have software issues.
5 Best Ways to Fix Bad Image Error on Windows 10 and Windows 11
If you are experiencing a bad image error, you likely have software issues.
DID YOU KNOW
Microsoft holds over 59,000 US and international patents.
