If your Windows PC is stuck on repairing disk errors and shows that ‘this might take an hour to complete,’ we are here to fix this issue without you having to face data loss, system instability, or even complete failure of the hard drive. Here are 8 ways to fix Windows stuck on repairing disk errors.

But what exactly causes repairing disk errors in Windows? There are several reasons including bad sectors on the hard drive, corruption in the file system, or problems with the hardware itself. This article will cover all significant ways you can use to quickly fix disk errors. The best part is that all the mentioned repair tools in Windows are built-in. That said, let’s begin with the fixes.
1. Patiently Wait Until Windows Complete Repairing
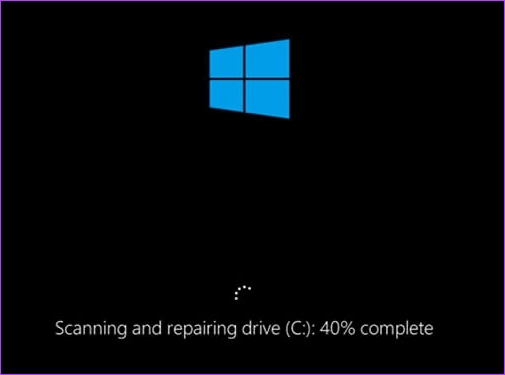
The first and foremost thing you must do is wait patiently for the repair process to finish. Give the system enough time (at least an hour) to repair the disk errors, which you will also see mentioned on the screen below the loading animation.
What can go wrong? Interrupting the repair process may damage your hard drive, potentially resulting in data loss. Moreover, interruptions could make your PC unresponsive or crash, and you may have to start the process again. That said if you are done waiting, jump to the next method.
2. Remove External Devices Connected to Windows PC
If waiting didn’t help, taking out all external devices might. These could be the obstacles getting in the way of fixing Windows. However, removing external devices doesn’t fix the problem; it makes it easier for Windows to figure out what’s wrong.
Aside from that, removing external devices can help make sure that the repair process is as thorough and effective as possible. More importantly, if there are any external devices connected to the system, they may be using resources that could be needed for the repair process.
3. Run Chkdsk Command in Safe Mode
In this method, we will use the CHKDSK command, which will help us check the hard disk for bad sectors, recover any readable data from them, and fix any errors. All you need to do is try restarting the PC or laptop from Safe Mode. Follow the steps below.
Step 1: Press the Windows key on your keyboard, hold the Shift key, click the Power button, and select Restart.

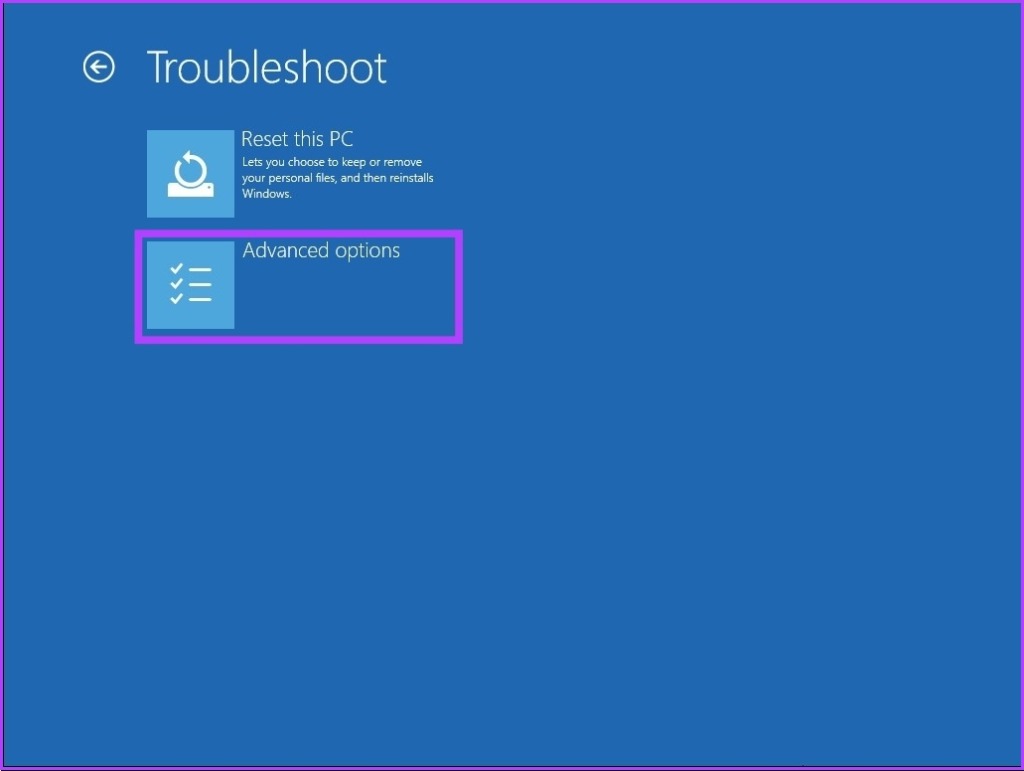
Step 2: In the ‘Choose an option’ screen, go to Troubleshoot.

Step 3: Go to Advanced options.
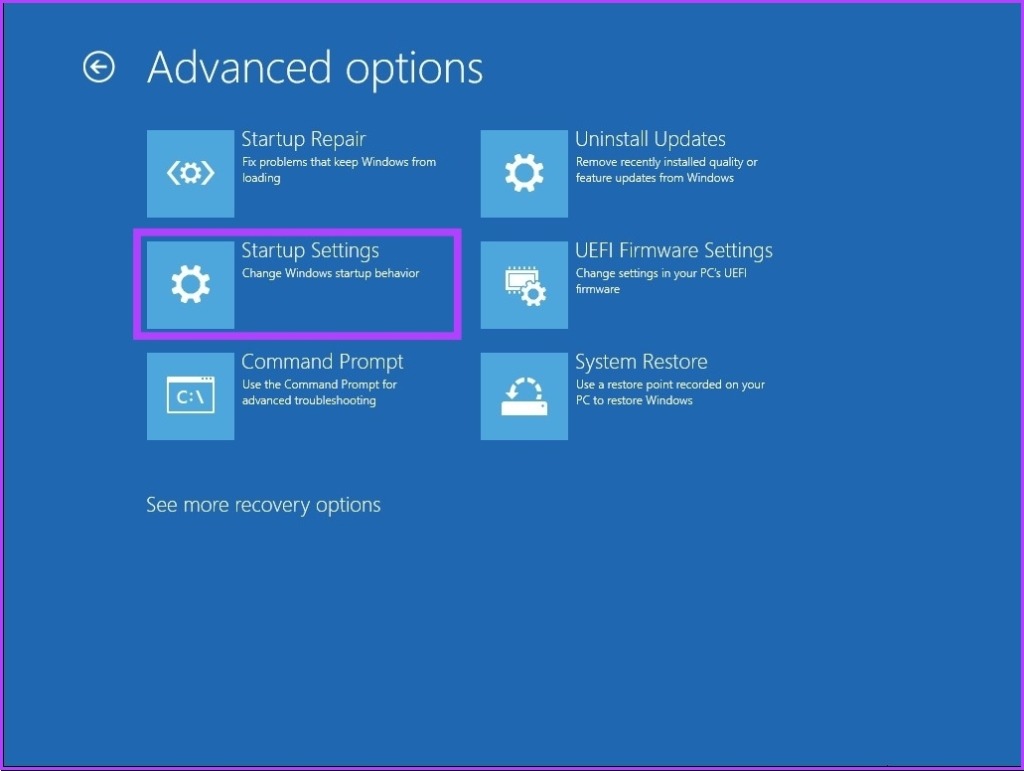
Step 4: Select Startup Settings.
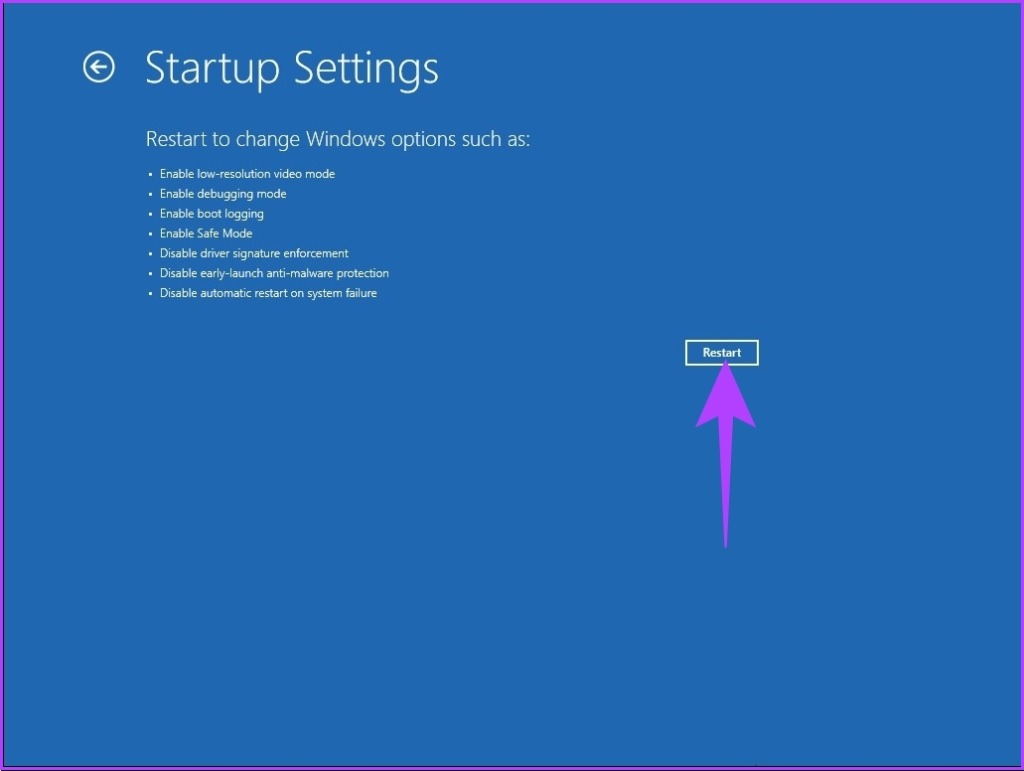
Step 5: Under the Startup Settings, click on the Restart button.
Step 6: Now, select ‘Enable Safe Mode’ by pressing the mentioned number (4) on the keyboard.
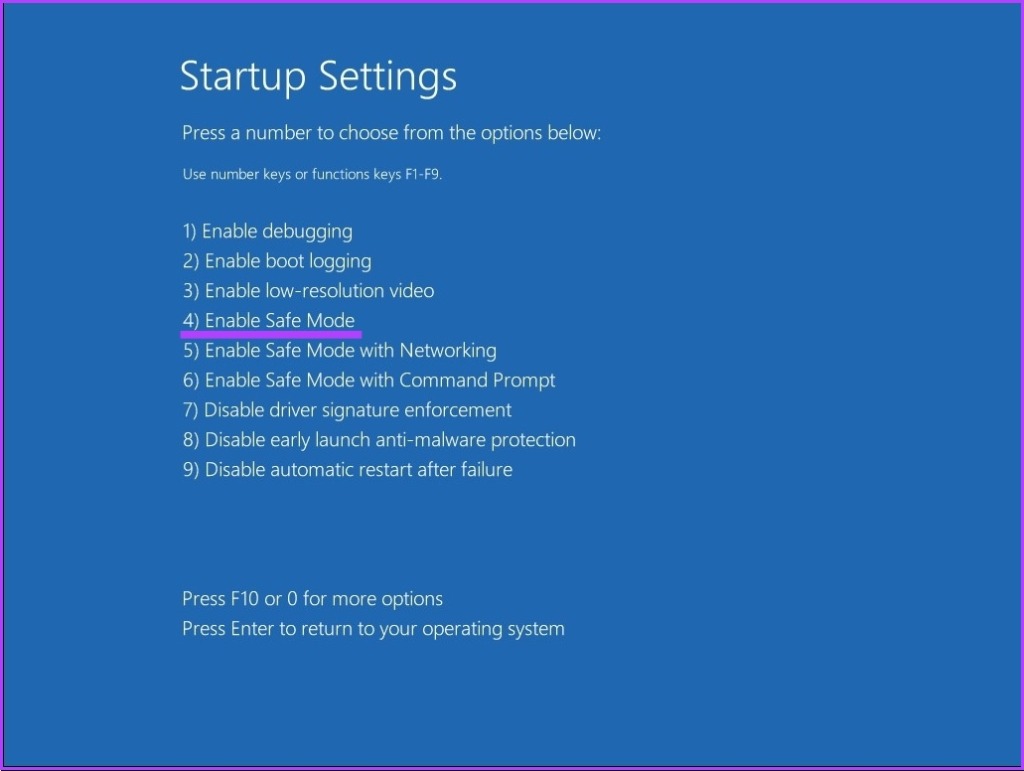
Your PC will restart automatically in Safe Mode.
Step 7: Press the Windows key on your keyboard, type Command Prompt, and click ‘Run as administrator.’
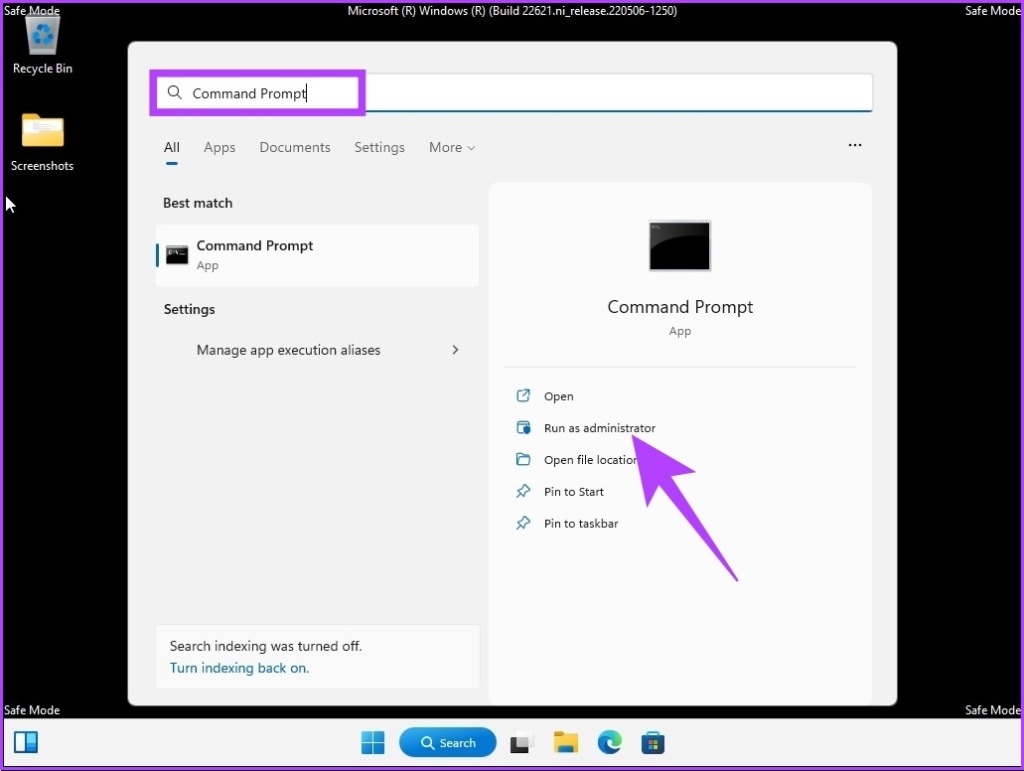
In the prompt, click Yes.
Step 8: Type the below command and press Enter.
Chkdsk /f c:
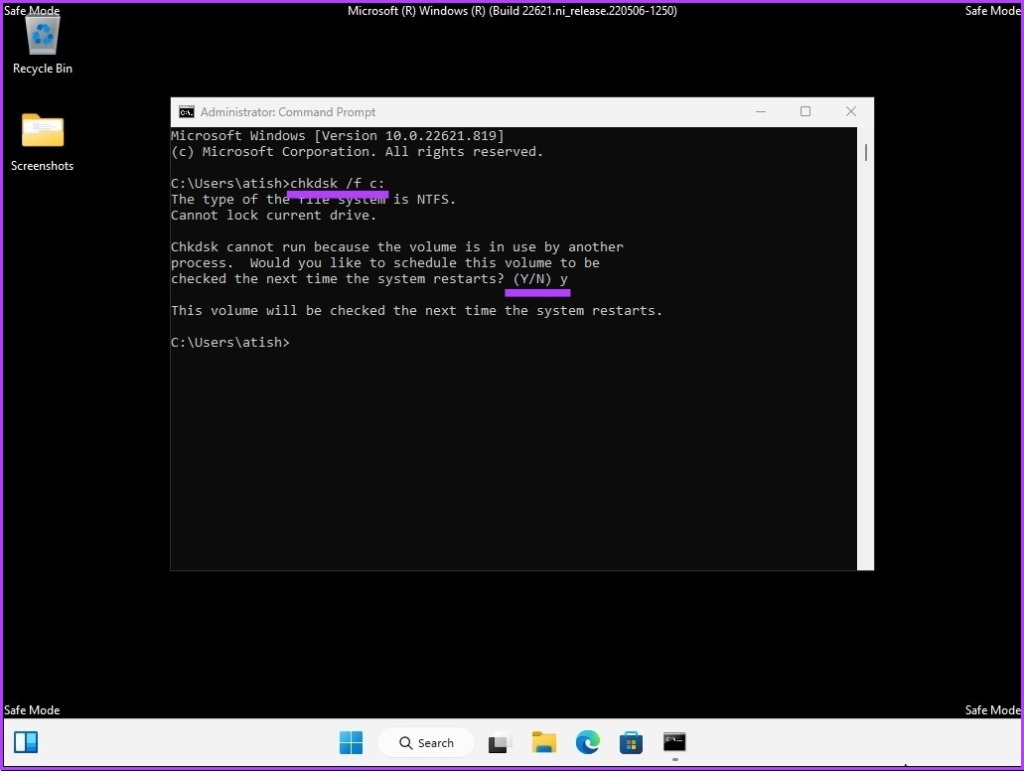
You will be asked, “Would you like to schedule this volume to be checked the next time the system restarts? (Y/N),’ Press Y on your keyboard.
With this, your PC will get unstuck from repairing disk errors. If it didn’t help, jump to the next method.
4. Repair Windows Disk Errors Using the Repair-Volume Command
In this method, we will be utilizing the repair-volume command using Windows PowerShell. Before proceeding, make a note of the driver’s letter on your external drive.
Step 1: Press the Windows key on your keyboard, type PowerShell, and click ‘Run as administrator.’
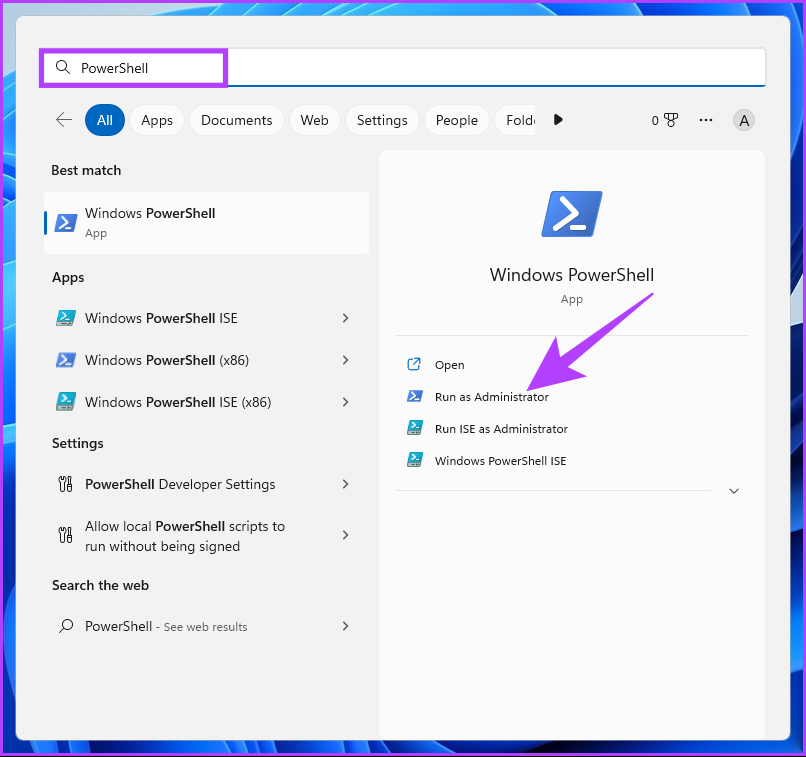
In the prompt, click Yes.
Step 2: Type the below command and press Enter.
Note: Replace ‘driver-letter’ with your original driver letter in the command line below.
repair-volume drive-letter -scan
repair-volume drive-letter -offlinescanandfix
repair-volume drive-letter -spotfix
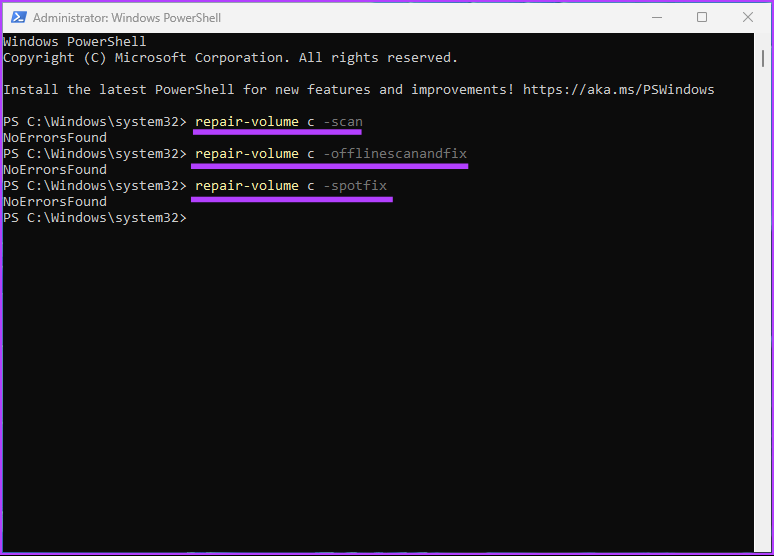
Once the scanning process is complete, restart your computer. This will fix the Windows stuck on repairing disk error. If this method does not work, perhaps the next one will.
5. Attempt Repairing Windows Disk Error Using System Restore
This method’s execution depends on whether you created any System Restore Point before running into the issue. If you created a restore point, follow the below-mentioned steps.
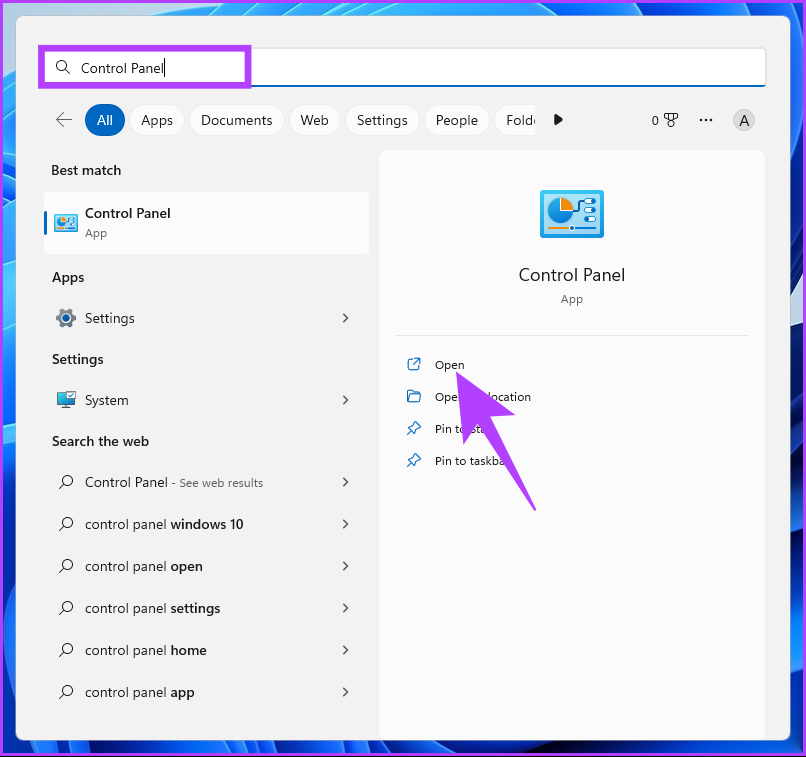
Step 1: Press the Windows key on your keyboard, type Control Panel, and click Open.
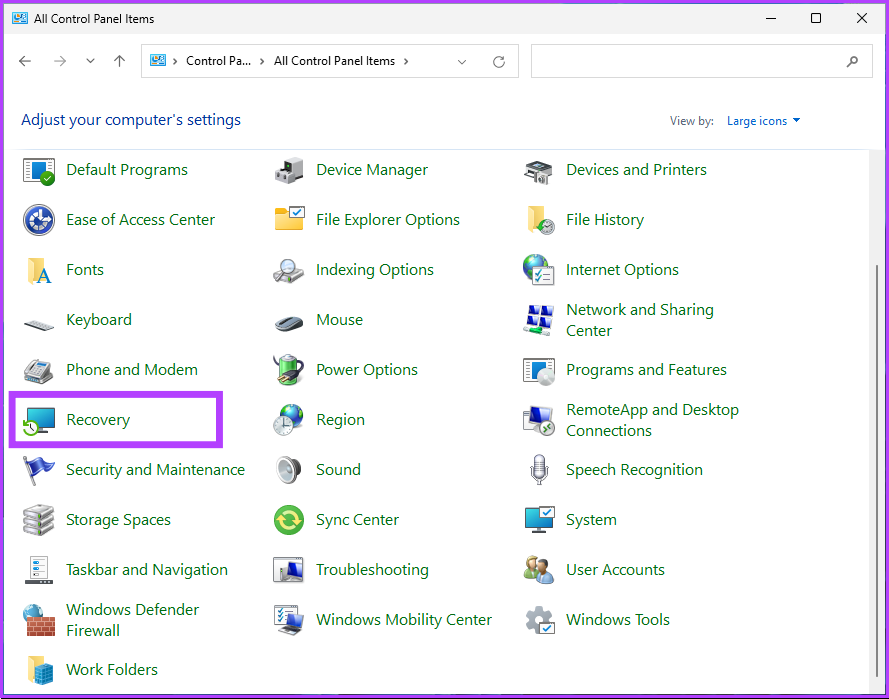
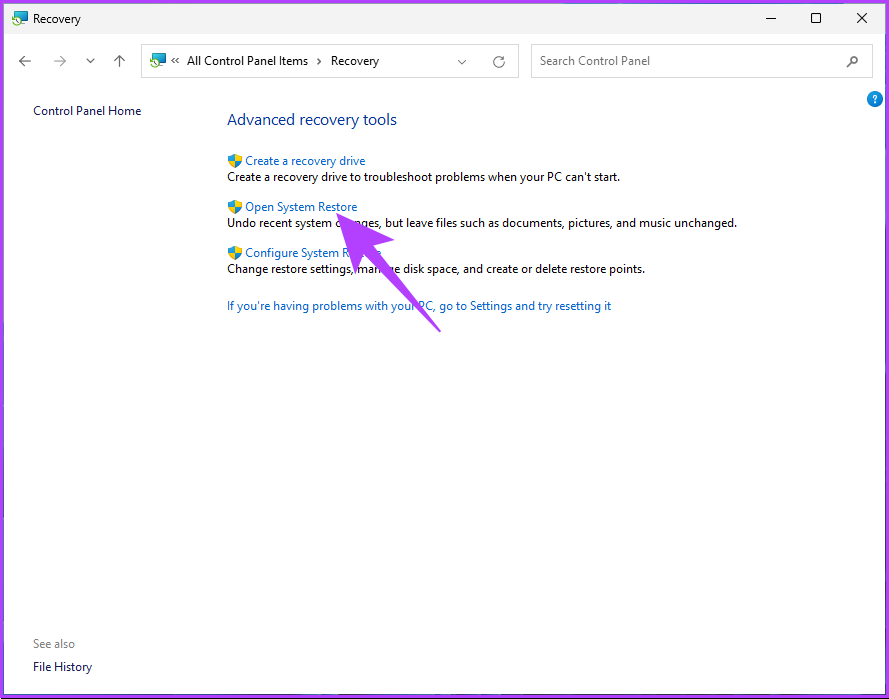
Step 2: Go to Recovery.
Note: If you don’t see Recovery, click on the drop-down next to ‘View by:’ and select Large icons.
Step 3: Select ‘Open System Restore.’
Step 4: In the System Restore window, click Next.

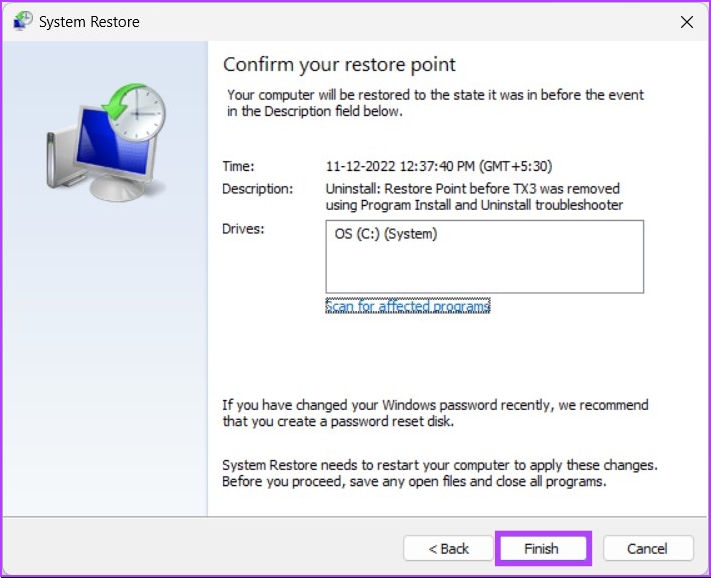
Step 5: Now, choose the Restore Point related to the problematic app, driver, or update, then click Next.

Step 6: Finally, click Finish.
This should resolve the PC’s inability to repair itself. If you are someone who didn’t create any System Restore points, ignore the next method and hop on to the other one.
6. Run Automatic Startup Repair
This is another way to fix the repairing disk error if you don’t have a System Restore point. We will be using the Automatic Startup Repair options to fix Windows repair disk errors. Follow the steps below.
Step 1: Press the Windows key on your keyboard, hold the Shift key, click the Power button, and select Restart.
Step 2: In the ‘Choose an option’ screen, go to Troubleshoot.
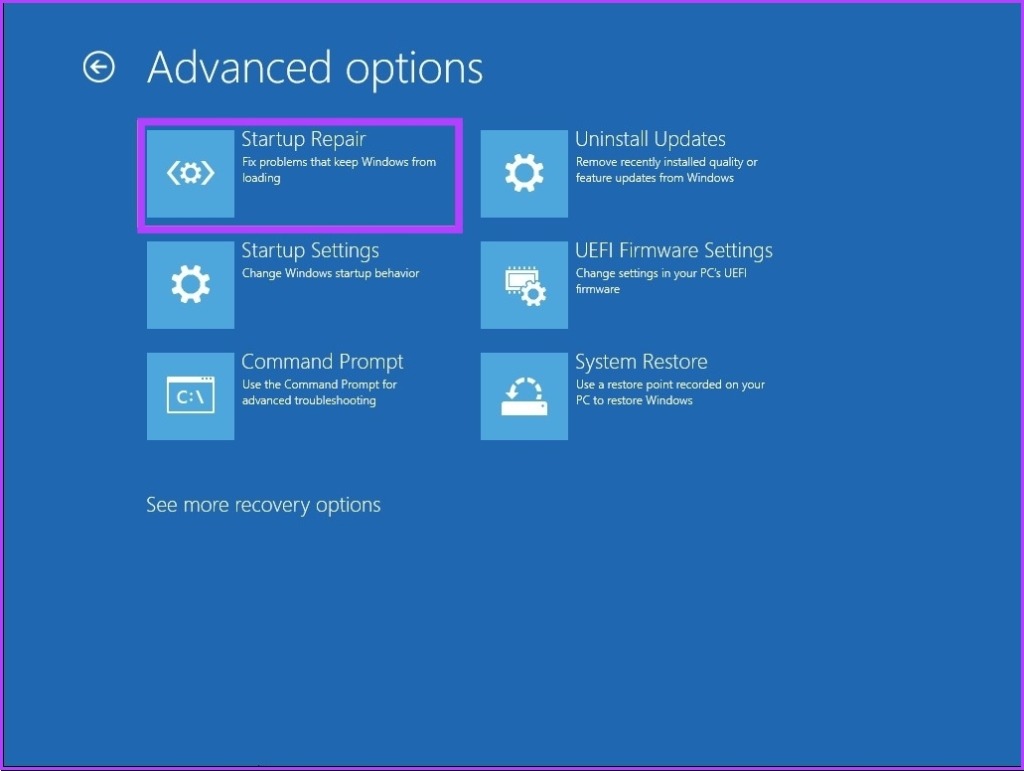
Step 3: Go to Advanced Options.
Step 4: Select Startup Repair.
There’s a high chance that Windows Automatic Repair will fix the repairing disk error.
7. Use Windows Installation Media
This is another way to fix stuck disk errors on Windows. The steps involved in this method use bootable installation on Windows. Follow the below steps.
Step 1: Download the Windows ISO file from Microsoft’s website on a normal computer.
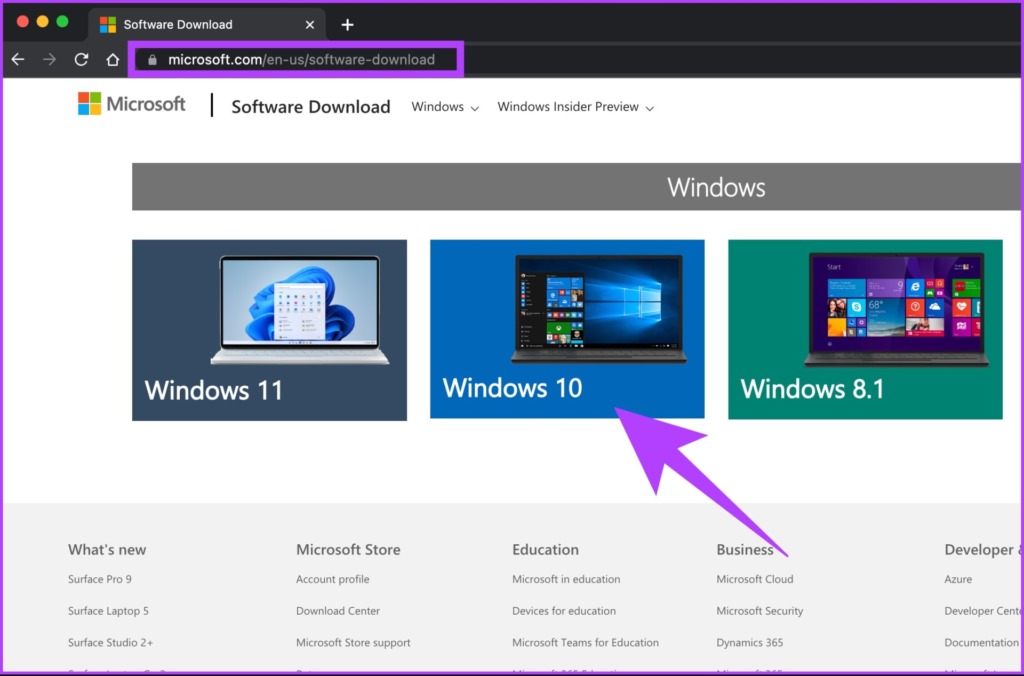
Step 2: Create a bootable USB drive or DVD drive.
Note: We have extensively covered an explainer on how to make a bootable device.
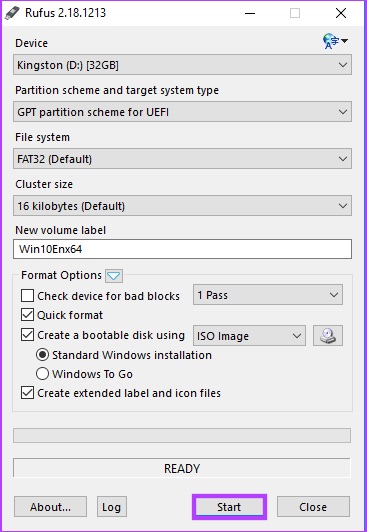
Step 3: Now, boot from a USB or DVD drive.

This will load Windows from the bootable device.
Step 4: From the Windows Setup screen, click Next.

Step 5: In the next screen, choose ‘Repair your computer.’

This will boot your computer into Advanced Recovery. Give it some time.
Step 6: In the ‘Choose an option’ screen, go to Troubleshoot.
Step 7: Select Advanced Options.
Step 8: Select Startup Repair.
Step 9: Finally, select the operating system.
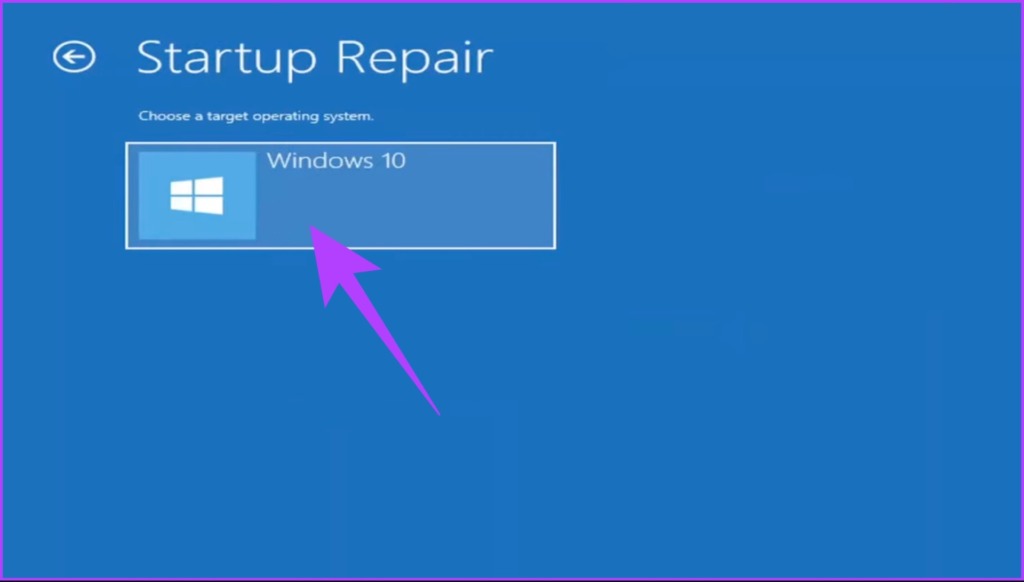
All you need to do is follow the instructions displayed. You will be required to verify your status as an admin by putting the account password in the associated email. Once the verification is complete, Windows will diagnose your computer and attempt repairs.
8. Check and Replace Your Hard Disk
This is the last resort. If none of the above methods worked to resolve the Windows stuck on repairing disk error, the damage was likely already done. Now, you will need to repair your computer’s hard disk; if not, get a new one.
FAQs on Repairing Windows Disk Errors
It depends on the specific repair process. If you run the chkdsk utility, no data is erased. However, other repair processes may require formatting the drive, which wipes out all data.
Yes, a disk can become corrupted. Disk corruption can occur for many reasons, including hardware failures, power outages, software bugs, and malicious attacks.
Unstuck Windows Disk Errors
All the methods mentioned in this article can help you fix Windows stuck on repairing disk errors. However, not all methods may work for you. We would recommend you start method 1 and move down from there. We hope this article helps you resolve the issue.
Last updated on 16 December, 2022
The above article may contain affiliate links which help support Guiding Tech. However, it does not affect our editorial integrity. The content remains unbiased and authentic.
Read Next
 Use Check Disk (chkdsk) in Windows to Check for Hard Disk Errors
Windows comes with a decent set of tools which indeed help you optimize the performance and efficiency of your machine.
Use Check Disk (chkdsk) in Windows to Check for Hard Disk Errors
Windows comes with a decent set of tools which indeed help you optimize the performance and efficiency of your machine.
 Top 7 Ways to Fix Runtime Errors on Windows 11
Do you keep getting runtime errors every time you launch specific programs on Windows 11?
Top 7 Ways to Fix Runtime Errors on Windows 11
Do you keep getting runtime errors every time you launch specific programs on Windows 11?
 Top 5 Ways to Fix File System Errors on Windows 11
A file system error is a common Windows issue that prevents you from accessing files and programs on your Windows computer.
Top 5 Ways to Fix File System Errors on Windows 11
A file system error is a common Windows issue that prevents you from accessing files and programs on your Windows computer.
 How to Fix Disk Cleanup Stuck on Calculating Issue in Windows
Disk Cleanup has been helpful since ages on the Windows platform.
How to Fix Disk Cleanup Stuck on Calculating Issue in Windows
Disk Cleanup has been helpful since ages on the Windows platform.
 How to Use Microsoft Fix it Center to Fix Windows Problems and Errors
Windows 7 introduced the “Action Center” feature to help users fix common problems.
How to Use Microsoft Fix it Center to Fix Windows Problems and Errors
Windows 7 introduced the “Action Center” feature to help users fix common problems.
 Top 6 Ways to Fix JavaScript Errors on Discord
Initially launched to cater to gamers only, Discord soon gathered attention from other communities.
Top 6 Ways to Fix JavaScript Errors on Discord
Initially launched to cater to gamers only, Discord soon gathered attention from other communities.
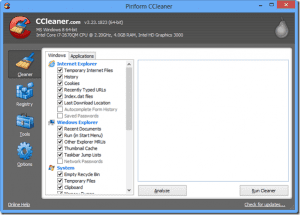 How to Use Ccleaner To Cleanup Windows PC and Fix Errors
Ccleaner is a free system optimization tool which can be used to remove unused files and speed up your PC.
How to Use Ccleaner To Cleanup Windows PC and Fix Errors
Ccleaner is a free system optimization tool which can be used to remove unused files and speed up your PC.
 4 Ways to Get Rid of Typing Errors Due to Laptop TouchPad
Even though laptops come with touchpad which is supposed to replace an external mouse, a majority of laptop users seem to prefer the good old mouse over the built-in touchpad.
4 Ways to Get Rid of Typing Errors Due to Laptop TouchPad
Even though laptops come with touchpad which is supposed to replace an external mouse, a majority of laptop users seem to prefer the good old mouse over the built-in touchpad.
DID YOU KNOW
You can switch manually to the tablet mode in Windows 10.