If you’re frequently encountering the Blue Screen of Death, or if the applications installed on your PC aren’t working as expected, the files on your Windows 11 PC may be corrupt. Luckily, corrupted files on Windows aren’t fatal and there are number of ways a file can get corrupt including, buggy updates, improper shutdowns, other hardware related issues, etc.

Regardless of what’s behind your corrupted files, you may want to repair these files immediately and prevent it from making your computer unusable. We’ve compiled a list of the eight best solutions that can be employed to repair the corrupt files on your Windows 11 PC.
1. Check for Windows Update
While this seems trivial, you can fix almost all issues you might face on your Windows computer with a simple software update.
Updating to the latest version of Windows ensures that you have the latest bug fixes that might fix the corrupted system files alongside the latest security updates that help improve your system’s performance and stability.
Here’s how you can check for Windows updates on your Windows 11 PC:
Step 1: Press the Windows + I keys together to open the Settings app.

Step 3: Select Windows Update from the left sidebar in the Settings window.
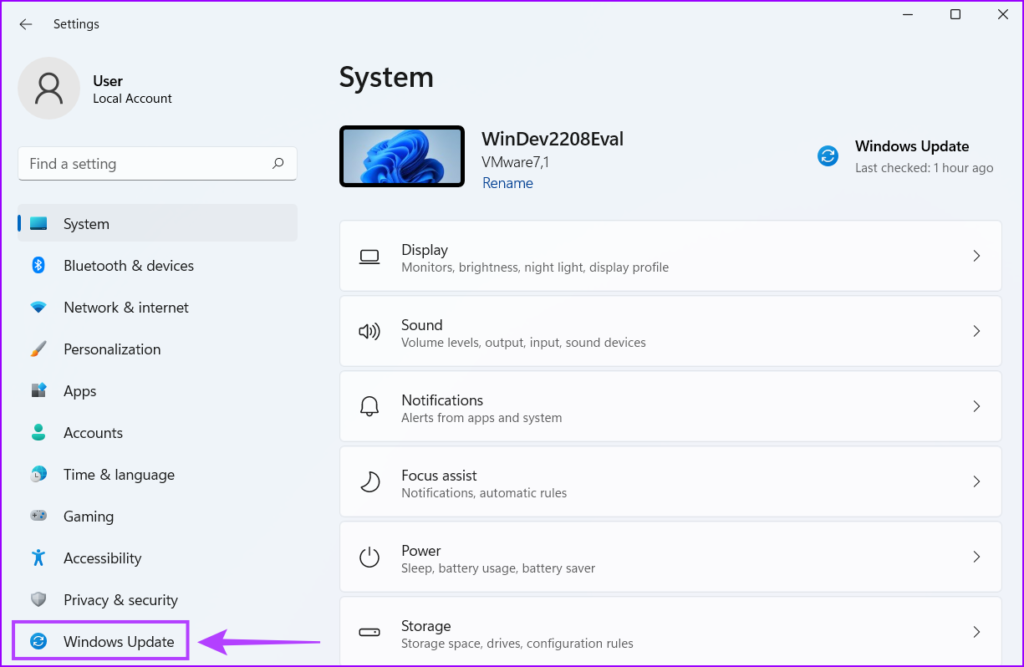
Step 4: Now click the Check for updates button.
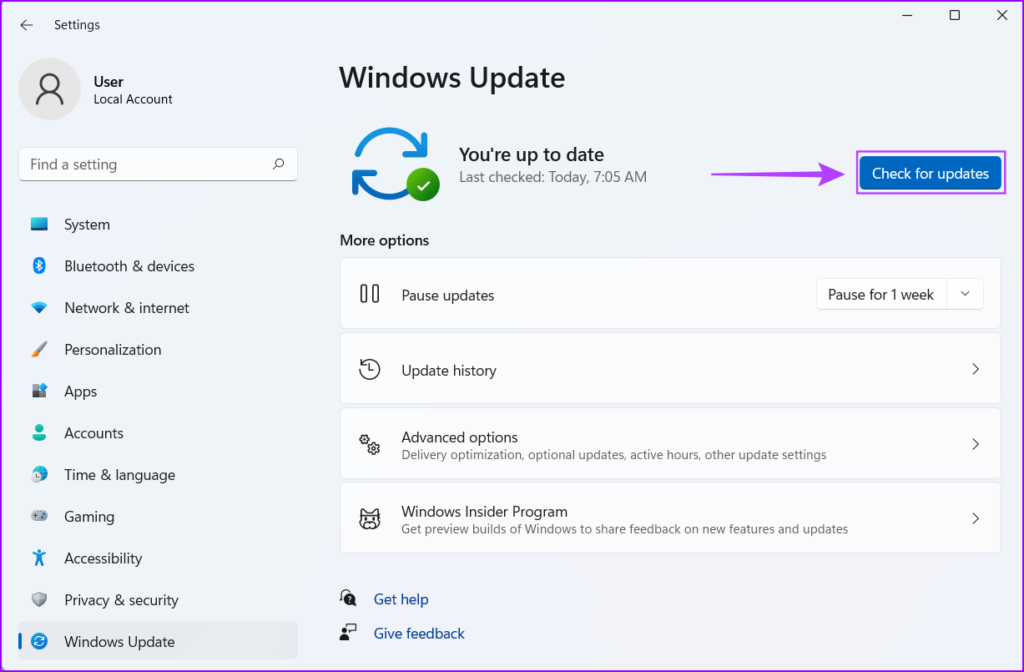
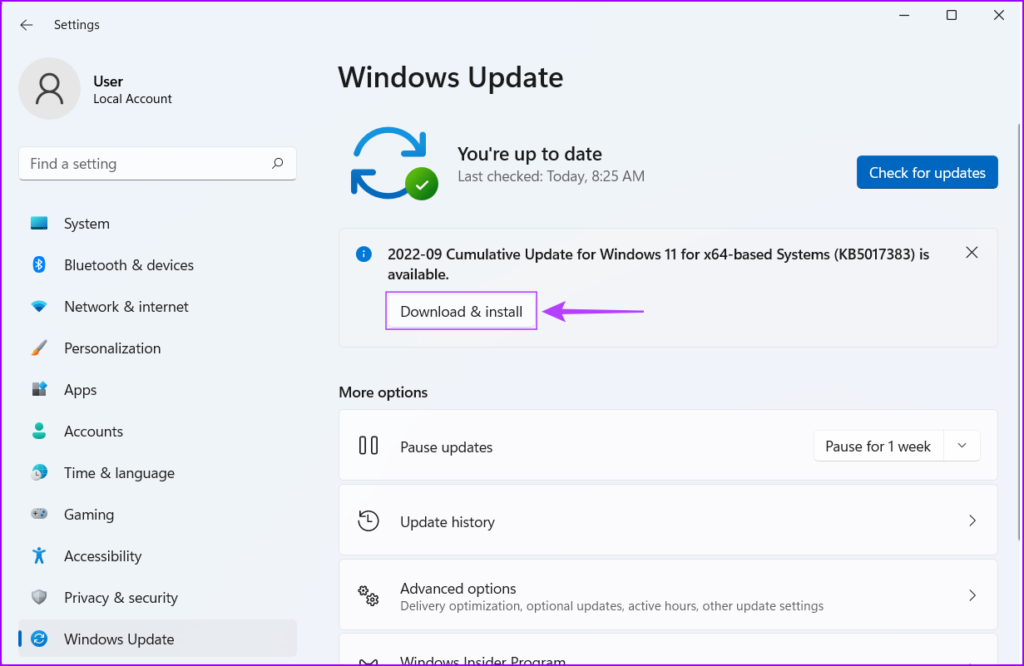
If a new Windows update is available, install it and check if it fixes the corrupted files and the features dependent on those files.
However, if you can’t downloading a Windows update, check our guide on how to fix Windows 11 updates not downloading or Installing.
2. Perform a System Restore
There’s a chance that you might be encountering corrupted files on your PC because you accidentally changed critical system settings or installed an unstable app. However, you can quickly reverse the changes you’ve made and fix the data corruption by performing a System Restore.
Do note that you can’t use this method if System Restore is not enabled on your PC. If you want to enable System Restore on your PC, check our guide on using System Restore on Windows 11.
With that said, here’s how you can perform a System Restore on your Windows 11 PC:
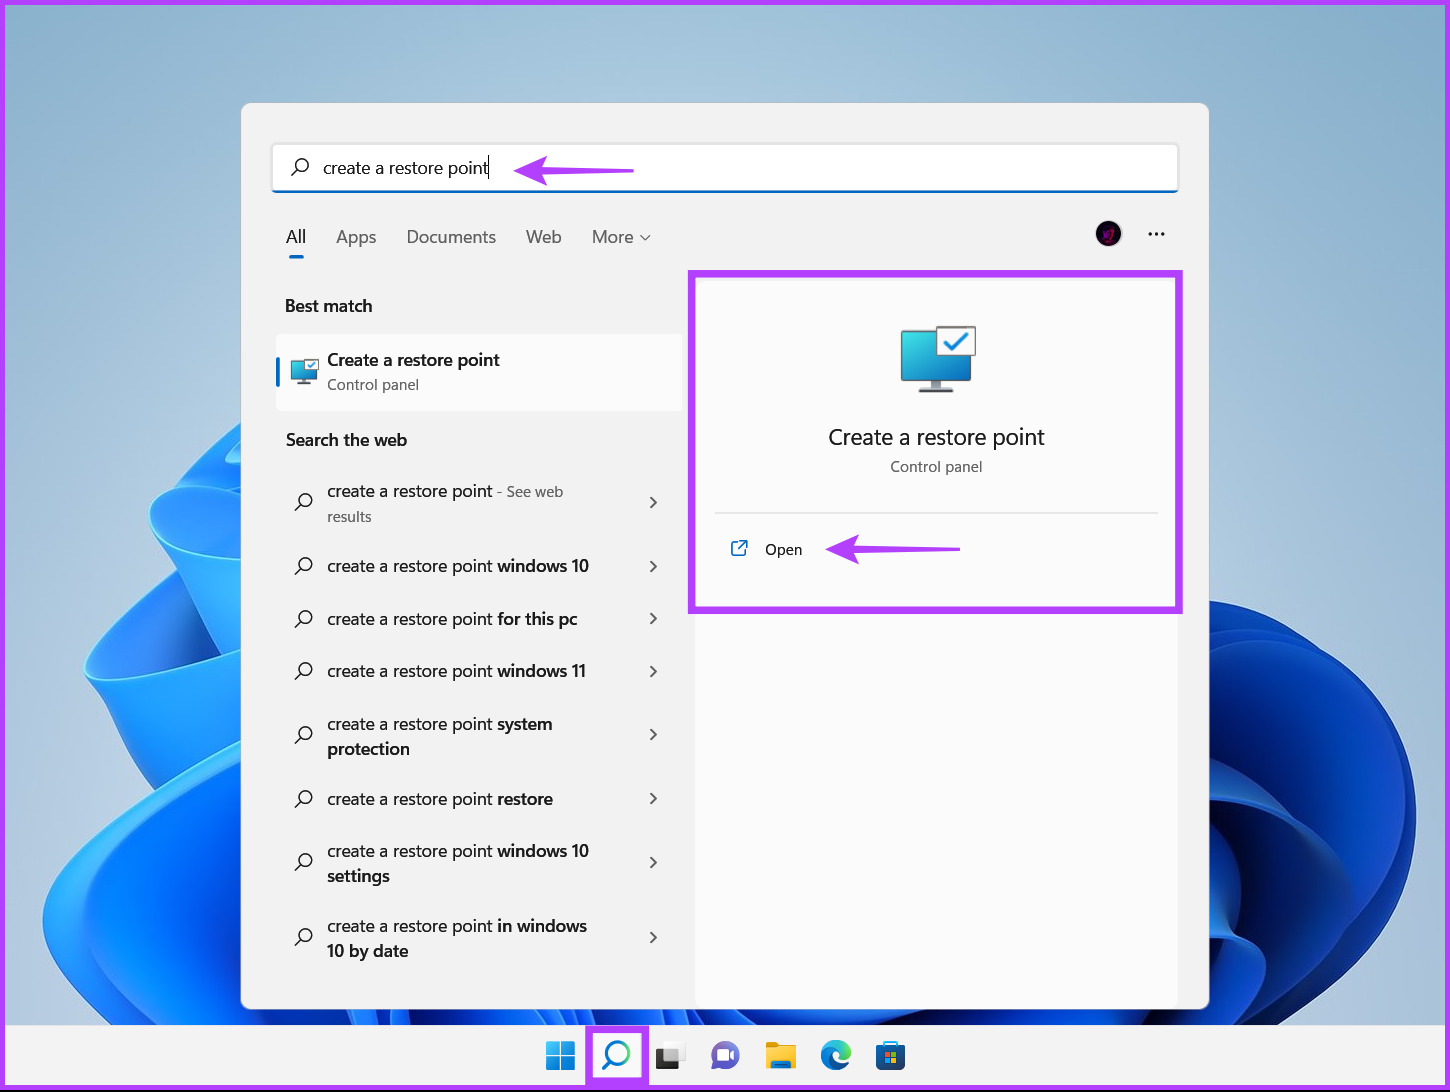
Step 1: Click the magnifying glass icon on the Windows 11 taskbar and type Create a restore point. Then select the Open button below the search result.
Step 2: When a System Properties window appears on the screen click on the System Restore.
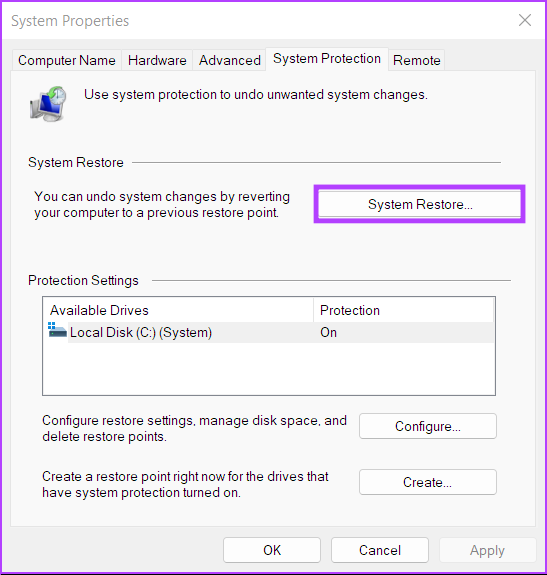
Step 3: Click Next to commence the restoration process.
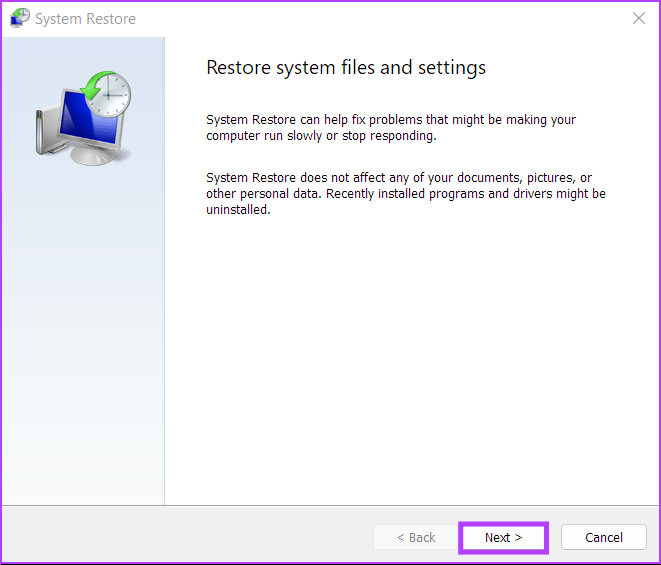
Step 4: Select a restore point you want to use. If required, click on ‘Scan for affected programs’ to see the changes made to the system before the restore point was created. Then, click Next.

Step 5: Confirm the restore point you want to revert your system to. After it is verified, click on Finish to commence the automated restoration process.

3. Run the Check Disk Command
Apart from the changes you’ve made to your system, issues relating to your computer’s hard drive or SSD can also lead to data corruption. If you think that’s the case with your system, you can quickly troubleshoot and fix those issues using the CHKDSK (Check Disk) command as detailed in the steps below:
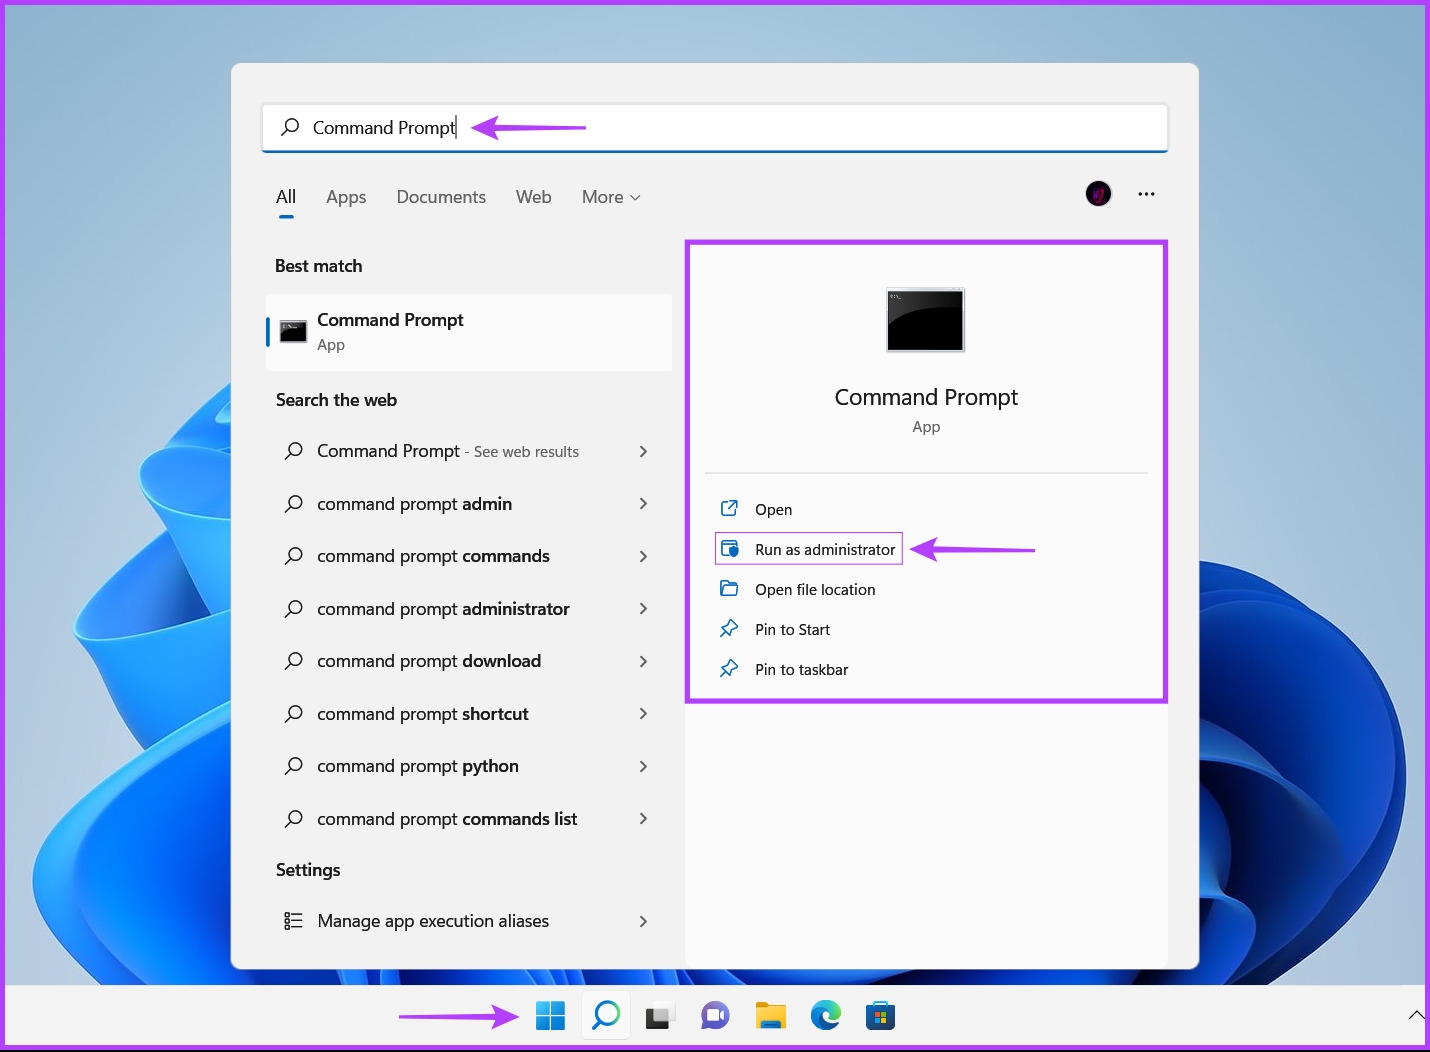
Step 1: Press the Windows + S keys and type Command Prompt. Then, from the results for Command Prompt, click on ‘Run as administrator.’
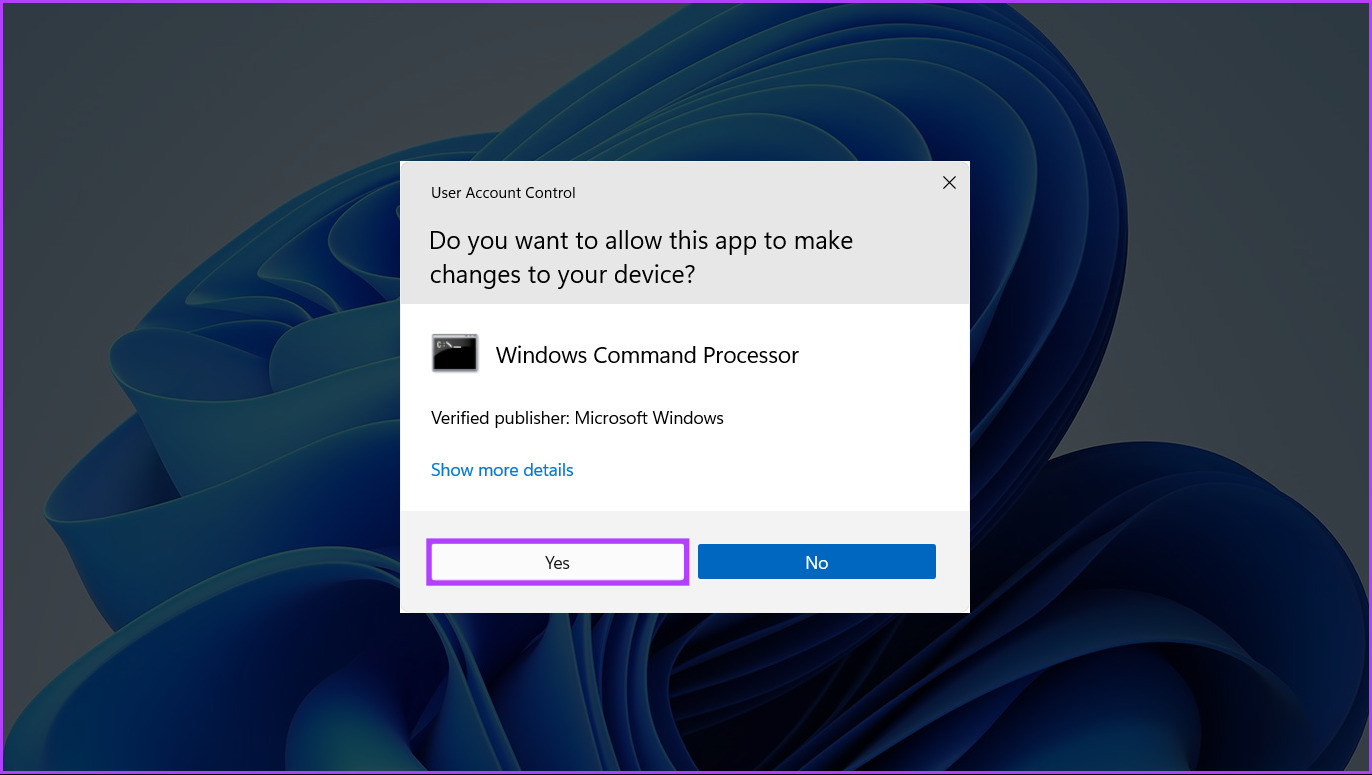
Step 2: Click on Yes when a User Account Control (UAC) prompt appears on the screen.
Step 3: Type the following command into the Terminal window and press Enter to scan your C: drive for issues and fix them.
chkdsk c: /r /scan /perf
This command executes a sequence of tests that can check your PC’s storage drives. The /r and /scan modifiers scan and repair the sectors on your hard drive to ensure there are no bad sectors.
Whereas the /perf modifier in the command allows your PC to use more system resources as possible to complete the Check Disk scan as quickly as possible. You can remove the /perf if you don’t mind waiting for the scan to run.
If you want to scan other drives on your PC, replace the c: in the command with any other drive letter.


This command might take some time to scan and fix your hard drive. After CHKDSK completes scanning your PC, you’ll see a message indicating whether or not it found any corrupt files that need fixing.
If the scan didn’t find any issues, you would get a message saying, ‘Windows has scanned the file system and found no problems. No further action is required.’ However, if any corrupted files are detected, it will automatically repair them for you.
4. Use SFC and DISM Commands
You can quickly run an SFC (System File Checker) scan followed by a DISM (Deployment Image Servicing and Management) scan to find and fix the corrupt files on your system. Here are the steps for the same:
Step 1: Press the Windows + S keys and type Command Prompt. Then, from the results for Command Prompt, click on ‘Run as administrator.’
Step 2: Click on Yes when a User Account Control (UAC) prompt appears on the screen.
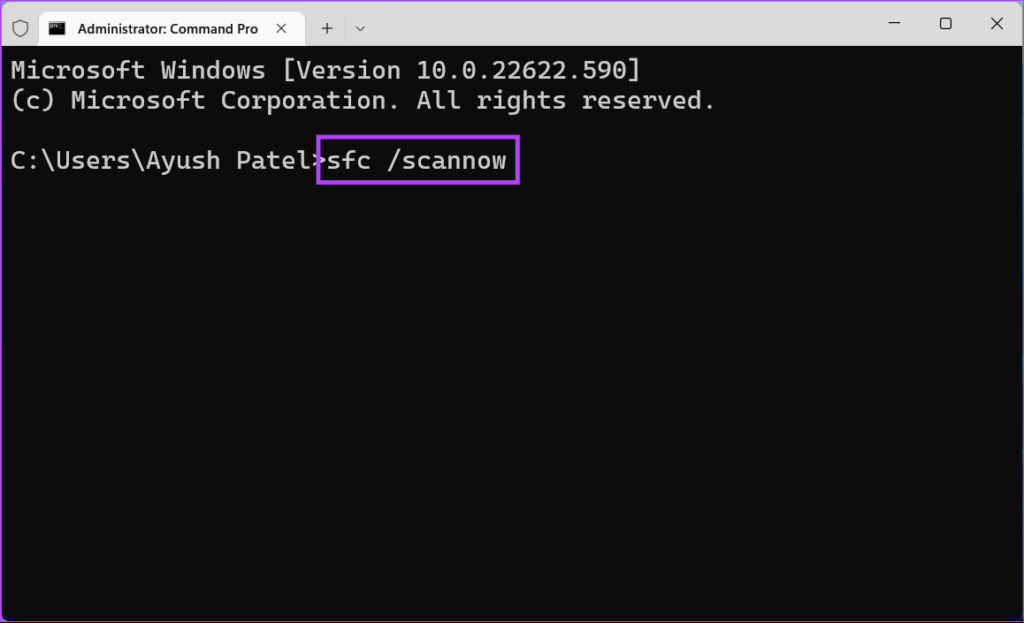
Step 3: Type the following command into the Terminal window and press Enter:
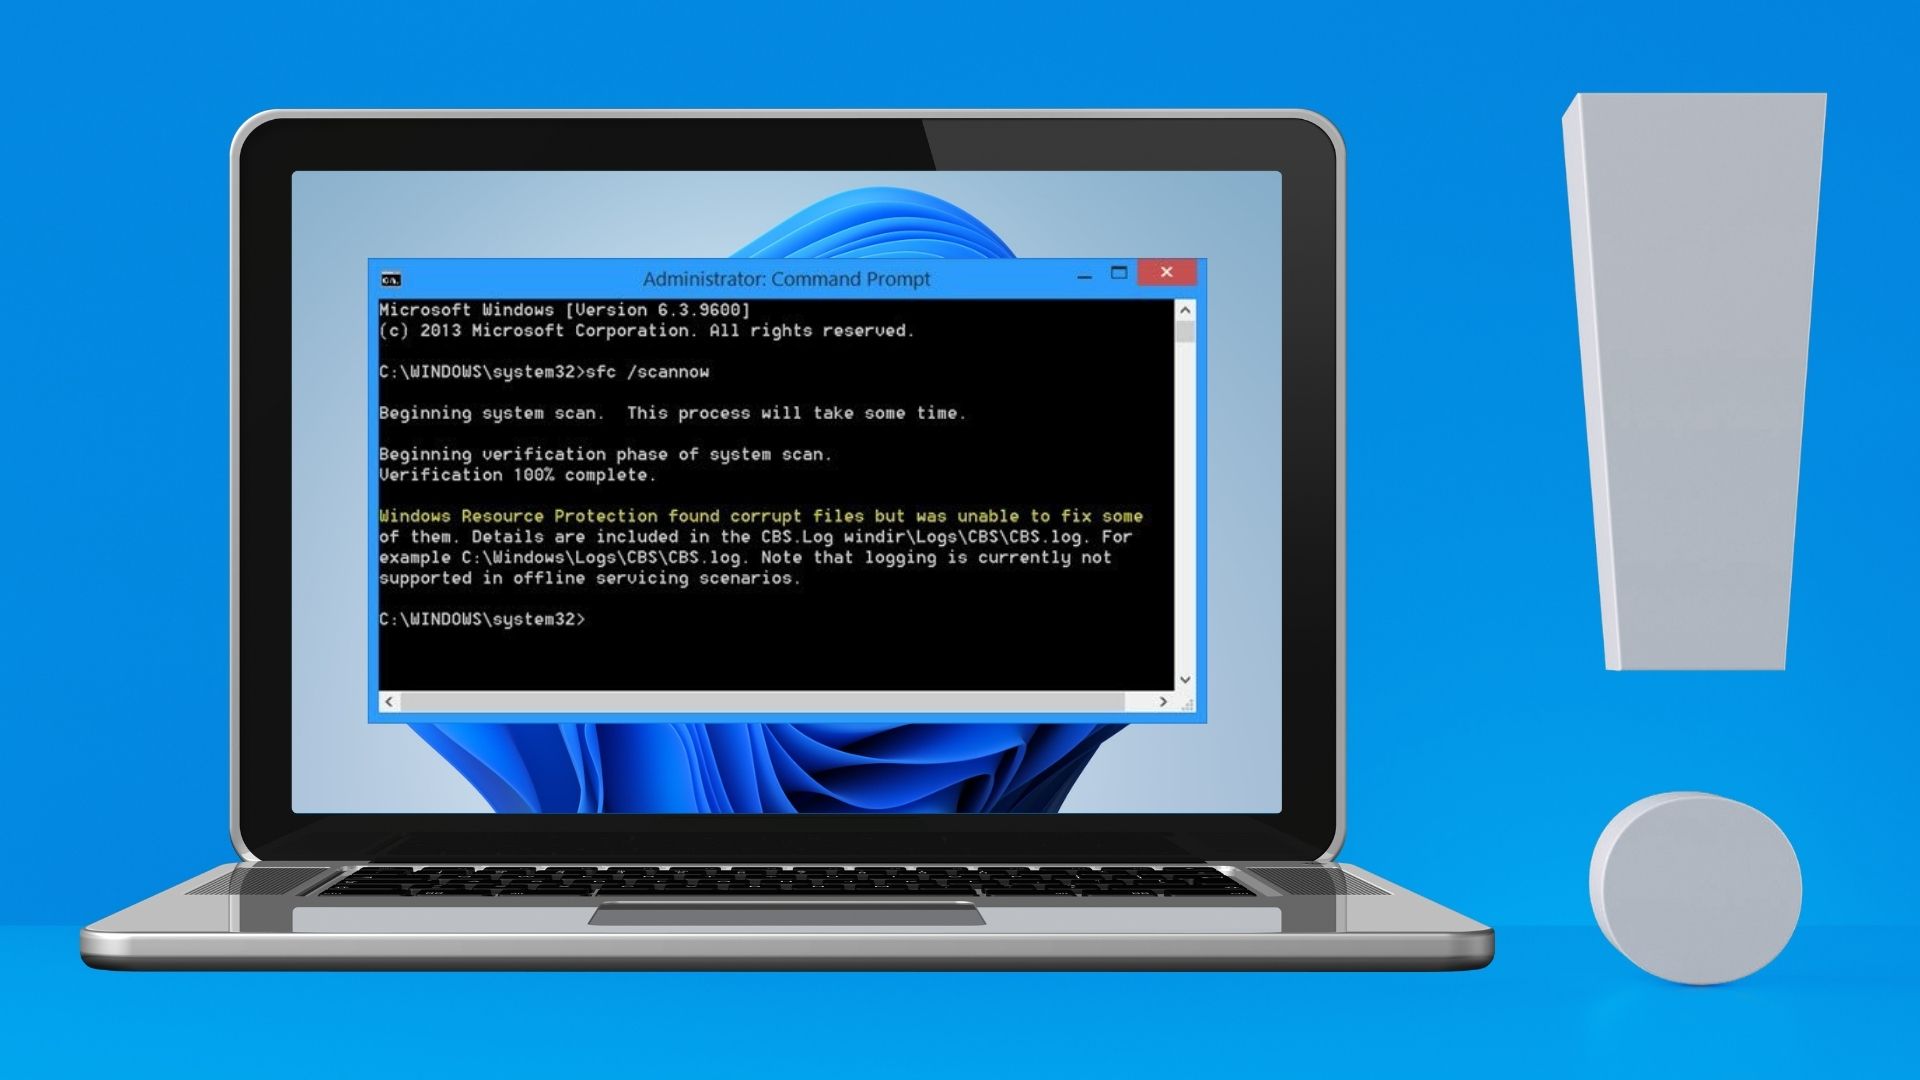
SFC /scannow
Running this command instructs Windows to scan for corrupted DLL (Dynamic Link Libraries) and other vital system files on your PC. Furthermore, running this command replaces the broken system files with functioning ones if any corruption is detected.
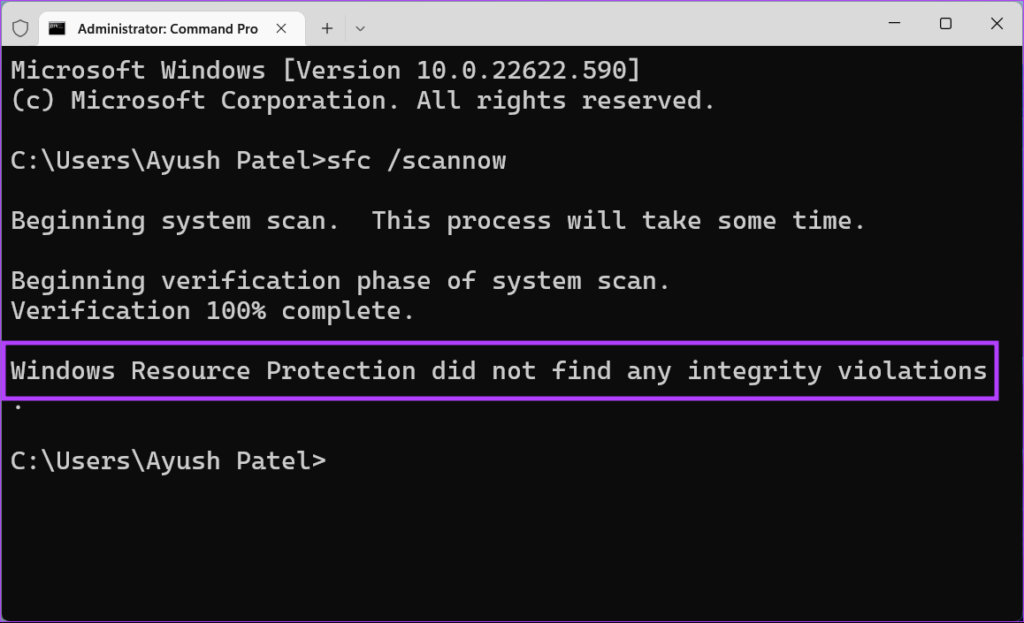
After the SFC (System File Checker) scan completes scanning your PC, you’ll see a message indicating whether or not it found any problems that need fixing.
If the SFC scan didn’t find any issues, you would get a message saying, ‘Windows Resource Protection did not find any integrity violations.’ However, if any issues relating to corrupted configuration files are discovered, it will automatically repair them for you.
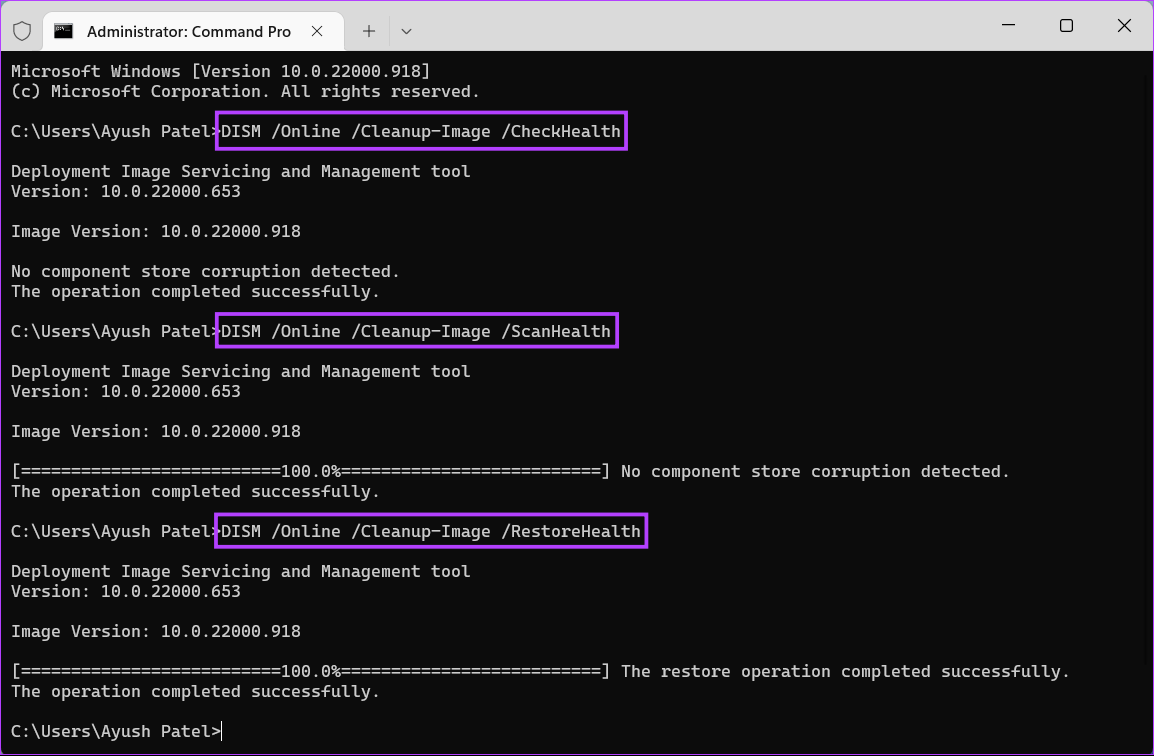
Step 4: Run a DISM (Deployment Image Servicing and Management) scan once you have completed the SFC scan.
Running a DISM command scans for corruption and repairs issues with the operating system. Although this scan might seem similar to the SFC scan, a DISM scan is a bit more advanced. DISM also scans the recovery and boot sectors for corruption and can be used to restore the resiliency of your files if any corruption is detected.
To perform a DISM scan on your PC, execute all the commands listed below one command at a time by copying and pasting them into Command Prompt and pressing the Enter key.
DISM /Online /Cleanup-Image /CheckHealth
DISM /Online /Cleanup-Image /ScanHealth
DISM /Online /Cleanup-Image /RestoreHealth
This DISM scan might take some time. Restart your PC after completing both scans to see if it helps to restore your corrupted data.
5. Run Startup Repair
Startup repair is a troubleshooting tool built into Windows that helps fix issues when your PC doesn’t start. The tool also tries to fix the corrupt files on your PC to ensure those aren’t the culprit behind your PC not starting. You can improvise the Startup Repair tool to fix corrupt files on your PC even if it starts up as expected.
Here’s how you can commence Startup Repair using Advance Startup Options on your Windows 11 PC to fix corrupt files.
Step 1: Press and hold the Shift key on your keyboard.

Step 2: Keep holding the Shift key. Then, head to the Power menu in Start and click on Restart.

Step 3: When your PC restarts and you reach the blue Choose an option screen, release the Shift key. Then, click on Troubleshoot.

Step 4: Click on Advanced options.

Step 5: Click on Startup Repair.

Step 6: Wait for Startup Repair to scan and repair issues on your PC.

6. Use the Windows Memory Diagnostic Tool
Random Access Memory (RAM) or memory is an integral part of any computer. It allows the processor to quickly access temporary files used by programs running on your system. However, if memory fails to do its job, your system might start encountering glitches leading to data corruption.
Microsoft Windows, to help you troubleshoot such RAM-related issues, offers a handy tool called the Windows Memory Diagnostic Tool. And Here’s how you can use it on your system:
Step 1: Press the Windows + R keys together to access the Run utility.

Step 2: When a Run dialog appears on your screen type mdsched.exe. Then click on OK.

Step 3: You should see a Windows Memory Diagnostic Tool window pop up on your screen with two options:
- Click the ‘Restart now and check for problems (Recommended)’ option if you want to reboot your PC and troubleshoot memory-related issues immediately.
- Click the ‘Check for problems the next time I start my computer’ option if you want to schedule the Windows Memory Diagnostic Tool to run the next time your PC starts.

We selected the first option; you can choose the second option if required. Whichever option you may choose, once your PC restarts, the Windows Memory Diagnostic Tool will automatically start scanning your system for memory-related issues in Standard mode.

Running a two-pass scan in Standard mode should be enough to discover any memory error in most cases. However, if you want to change the scan options to Basic or extended and change the number of scan passes, press the F1 key on your keyboard to access more Options.

Do note that you will have to press the Tab key on your keyboard to cycle through the different scan options, F10 to Apply the new changes, or Esc to go back and Cancel the changes.
If no issues are detected move on to the next solution. Meanwhile, if issues are found, it might be time to replace your computer’s RAM and check if it fixes your corrupted data. While you’re at it you may also want to take a look at our full guide on how to use the Windows Diagnostic Tool on Windows 11.
7. Run the System Maintenance Troubleshooter
Windows has all kinds of troubleshooters to simplify troubleshooting and fix issues for normal users. You can run the System Maintenance Troubleshooter to find and fix problems with your computer that might be causing data corruption, as detailed in the steps below:
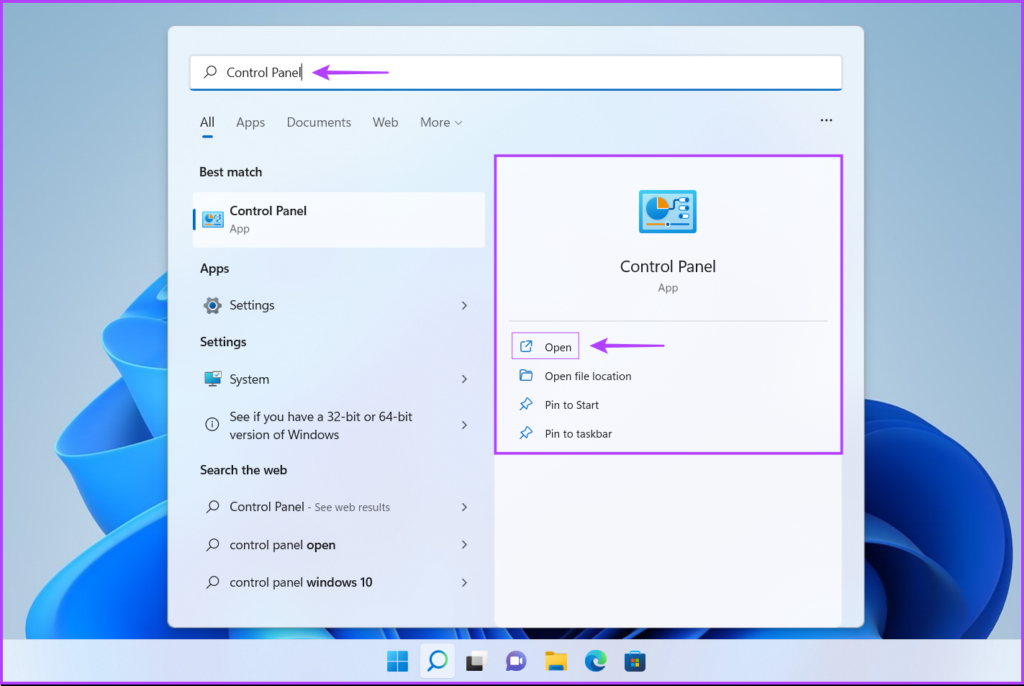
Step 1: Press the Windows + S keys to open Windows Search and type Control Panel. Then, from the results for Control Panel, click on Open.
Step 2: On the Control Panel window that opens, click on the Category drop-down and select Large Icons.
Step 3: Scroll down to the end of the page and click on Troubleshooting.

Step 4: On the troubleshooting page that appears, click on View all option located in the left sidebar.

Step 5: From the list of troubleshooters that appear, look for System Maintenance and click on it.

Step 6: Click on next to start the System Maintenance Troubleshooter.
Alternatively, you can also run this troubleshooter as an administrator by clicking on Advanced and selecting the Run as Administrator check box.

Step 7: If no issues are detected, click on ‘Try troubleshooting as an administrator’ and rerun the troubleshooter. Or click on Close.

8. Reset Your PC
Suppose none of the solutions listed above work for you, the only way to fix the corrupted files on your PC would be to reset and reinstall Windows from scratch. And If you’re worried a losing your data using this method, then you may want to take a look at our guide on how to reset a Windows 11 PC without losing data or follow the steps listed below:
Step 1: Step 1: Press the Windows + I keys on the keyboard to open the Settings app. Then click on Recovery.

Step 2: On the Recovery page, click on Reset PC.

Step 3: When a Reset this PC window appears on the screen, select any one of the relevant options:
- Select Keep My Files to keep your personal files unchanged and erase all your apps and system preferences.
- Select Remove everything to reset and wipe everything, including your files, apps, and system preferences.

Step 4: Now you will need to select how would you like to reinstall Windows 11 on your PC.
- Choose Cloud download if you installed Windows 11 manually. Do make sure you have a working internet connection if you select this option,
- Choose Local reinstall if your PC came with Windows 11 pre-installed.

Step 5: When you reach the Additional settings page of the Reset this PC window, click Next.

Step 6: Confirm your selected reset options and click on Reset. Alternatively, you can also click on the ‘View apps that will be removed’ option to see which app will be removed from your PC before clicking on Reset.

Once you click on Reset, your PC will reboot and initiate the System reset procedure. This procedure might take anywhere from 30-minutes to 1-hour, depending on your PC and selected options.
Fix Corrupt Files on Windows 11
After following the above solutions, you can easily fix the corrupt files on your Windows 11 PC. Let us know which solution worked out for you or if you’ve found a better solution to repair the corrupt files.
Last updated on 21 October, 2022
The above article may contain affiliate links which help support Guiding Tech. However, it does not affect our editorial integrity. The content remains unbiased and authentic.
Read Next
 Top 5 Ways to Fix ‘Windows Resource Protection Found Corrupt Files’ Error on Windows 11
Windows 11 can be annoyingly glitchy at times.
Top 5 Ways to Fix ‘Windows Resource Protection Found Corrupt Files’ Error on Windows 11
Windows 11 can be annoyingly glitchy at times.
 How to Fix and Open Corrupt Folder and Files in Windows 10
I can imagine your astonishment when you click on a folder or a file and it doesn't open on your Windows 10 PC.
How to Fix and Open Corrupt Folder and Files in Windows 10
I can imagine your astonishment when you click on a folder or a file and it doesn't open on your Windows 10 PC.
 Top 5 Ways to Fix Corrupt Drivers in Windows 10
Gone are the days when we manually installed required driver updates from the manufacturer's website or third-party sources on Windows machines.
Top 5 Ways to Fix Corrupt Drivers in Windows 10
Gone are the days when we manually installed required driver updates from the manufacturer's website or third-party sources on Windows machines.
 Top 6 Ways to Fix Can’t Open JPG Files on Windows 10 and Windows 11
Windows 11 is off to a flying start.
Top 6 Ways to Fix Can’t Open JPG Files on Windows 10 and Windows 11
Windows 11 is off to a flying start.
 Top 8 Ways to Fix Microsoft Word Opens Files in Read-Only Mode in Windows 10 and Windows 11
Microsoft Word is a popular word processor among Windows users for creating and editing documents.
Top 8 Ways to Fix Microsoft Word Opens Files in Read-Only Mode in Windows 10 and Windows 11
Microsoft Word is a popular word processor among Windows users for creating and editing documents.
 Top 3 Ways to Delete Old Windows Update Files From Windows 10 and Windows 11
Windows updates bring new features, security improvements, and bug fixes for your PC.
Top 3 Ways to Delete Old Windows Update Files From Windows 10 and Windows 11
Windows updates bring new features, security improvements, and bug fixes for your PC.
 What are ISO files and How to extract iso files, burn and mount them
ISO file, which is also known as a disc image, has .iso file extension.
What are ISO files and How to extract iso files, burn and mount them
ISO file, which is also known as a disc image, has .iso file extension.
 Top 5 Ways to Fix Some Update Files are Missing or Have Problems Error on Windows 11
Microsoft regularly releases updates for Windows 11 to keep your system secure and bug-free.
Top 5 Ways to Fix Some Update Files are Missing or Have Problems Error on Windows 11
Microsoft regularly releases updates for Windows 11 to keep your system secure and bug-free.
DID YOU KNOW
Up until September 14, 1995 domain registration was free.