Whenever you visit a website, your browser gathers some basic files to make the page load faster the next time you visit it. You wouldn’t notice it as the process takes place smoothly in the background. At times, Chrome fails to load that stored cache and ends up freezing the page.

Before you consider switching to a Chrome alternative, you can try troubleshooting the issue yourself. We’ll share some tips to help you fix Chrome waiting for cache error. Let’s check them out.
1. Clear Chrome Cache
The cache files stored by Chrome may be corrupted, which is why Chrome might be running into an error while loading them. You can try clearing cache on Chrome to see if it helps. Here’s how.
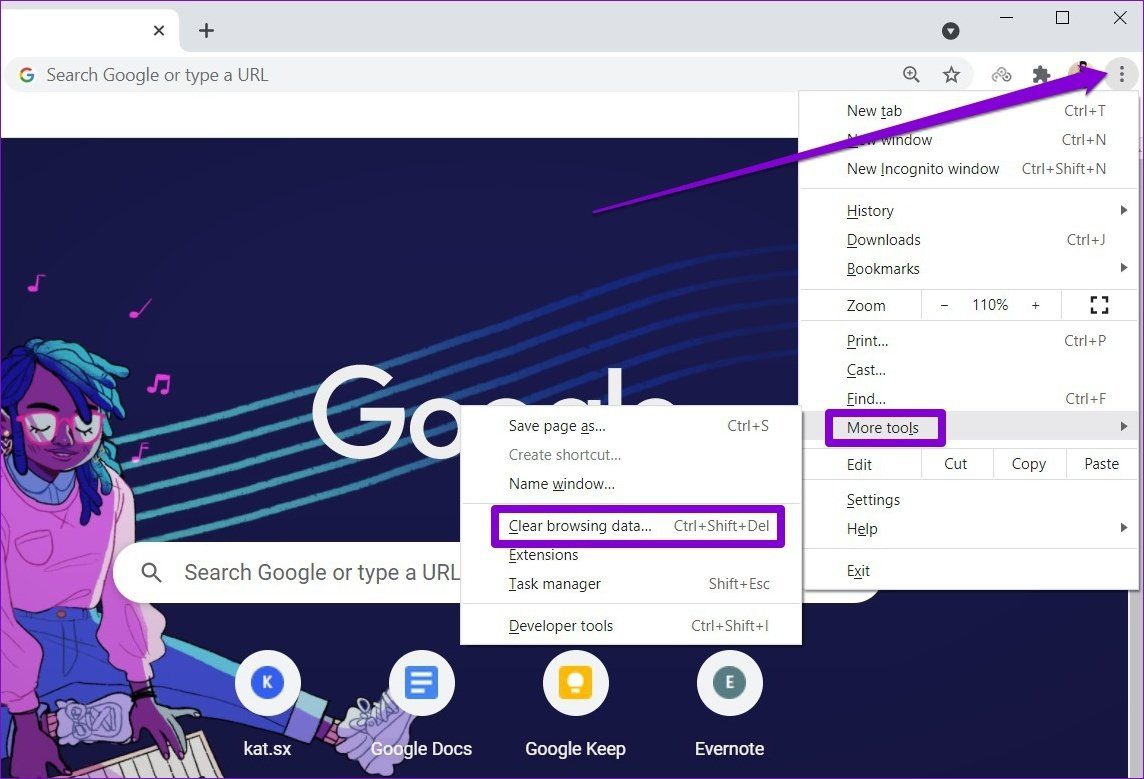
Step 1: Launch Chrome and click on the three-dot menu in the top right corner, select More Tools, and choose Clear browsing data.
Alternatively, you can also press Ctrl + Shift + Del shortcut to quickly open the Clear Browsing Data panel.
Step 2: Use the Time range option to select All time from the drop-down menu. Mark the checkboxes that read ‘Cookies and other site data’ and ‘Cached images and files’.
Lastly, hit the Clear data button.

Now relaunch Google Chrome and see if the issue is resolved.
2. Prevent Chrome From Writing Cache
Largely, the waiting for cache error in Chrome occurs only when the browser cannot create or access cache files on your PC. And the issue is much prominent among PCs that use a Solid-state drive (SSD) to write cache. In such scenarios, you can prevent your PC from storing any cache data to see if it helps. Here’s how.
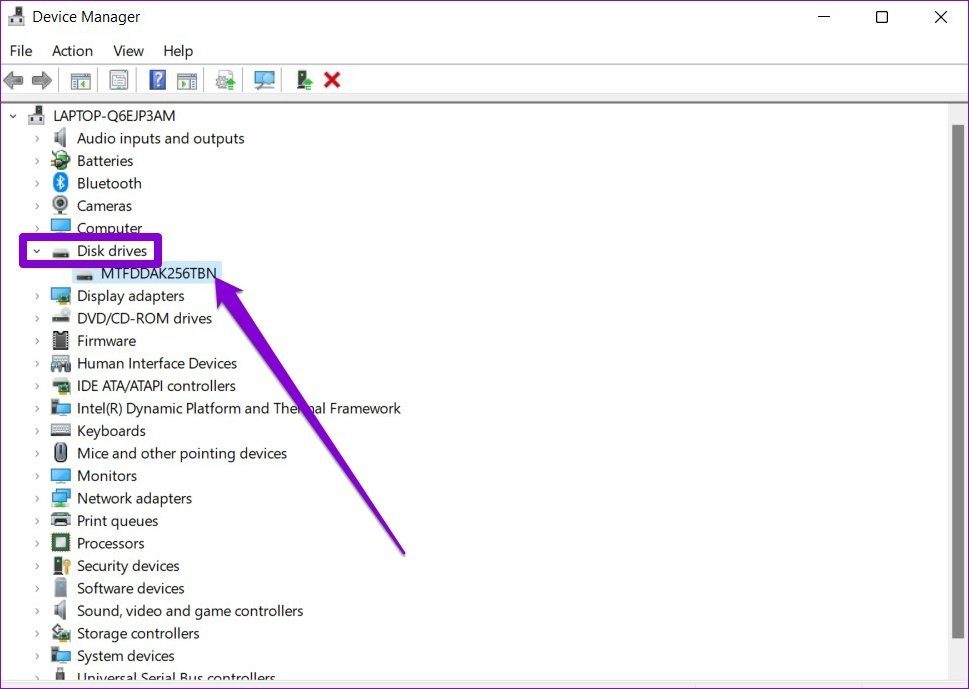
Step 1: Click on the Search tool on the Taskbar, type in device manager, and press Enter.

Step 2: In the Device Manager window, expand the Disk drives, double-click on your SSD drive to open Properties.
If you’ve multiple SSD drives on your PC, pick the one on which you’ve installed Google Chrome.
Step 3: In the Properties window, navigate to the Policies tab and uncheck the box that reads ‘Enable write caching on the device’. Lastly, click on OK.

Reboot your PC for changes to take effect and Chrome should work fine.
3. Create a New User Profile
Another potential fix for Chrome waiting for cache error is by creating a new user profile. This should launch Chrome with its default settings preference which might fix the error.
Follow the steps below to create a new user profile in Chrome.
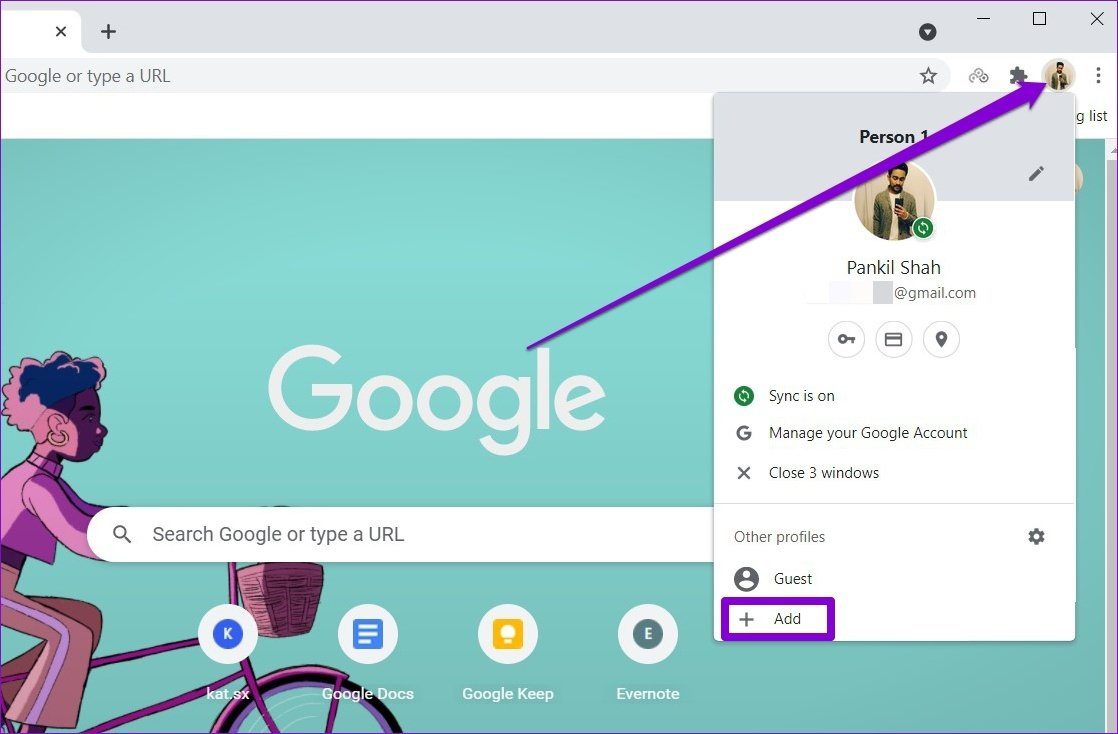
Step 1: Click on the current profile icon in the top right corner. Under Other profiles, click on the Add button.
Step 2: Next, select the ‘Continue without an account’ option.

Step 3: Now write a suitable name and pick a color scheme for your profile. Then click on Done to proceed.
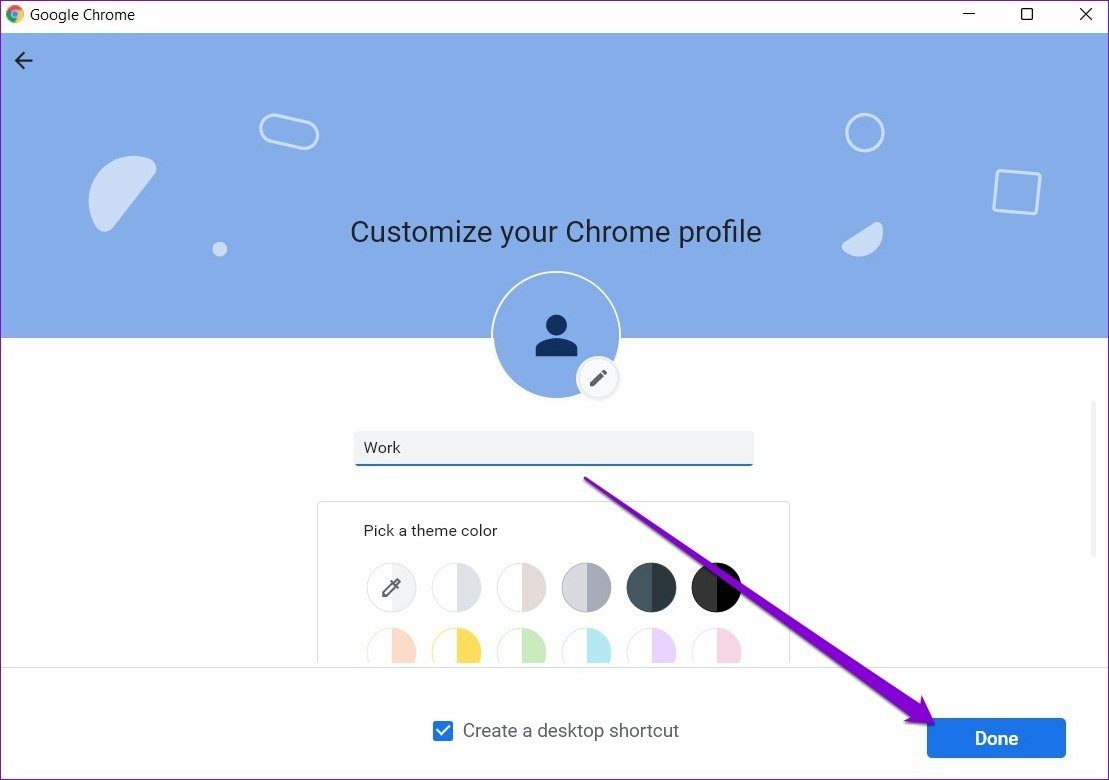
This should restart Chrome with your new profile. Now go ahead and see if the issue is resolved. You can log in with your Google account to retrieve your old bookmarks and to set preferences if it is.
4. Reset Google Chrome
You might have to reset Chrome to its default settings to overcome the issue. It’s important to know that resetting Chrome will remove all Chrome’s extensions, cache, and settings preferences.
To reset Chrome, type chrome://settings/reset in the address bar up top, and press Enter. Under ‘Reset and clean up’, click on ‘Restore settings to their original defaults’.

On the confirmation pop-up box, click Reset Settings to confirm.

5. Reinstall Chrome
If the issue persists even after resetting Chrome, you’ll have to uninstall it and install it again. This way, you can get rid of old data associated with Chrome and start completely from scratch. Plus, you’ll also update Chrome in the process. If you decide to go with this option, ensure that all your important data is synced with your Google account beforehand.
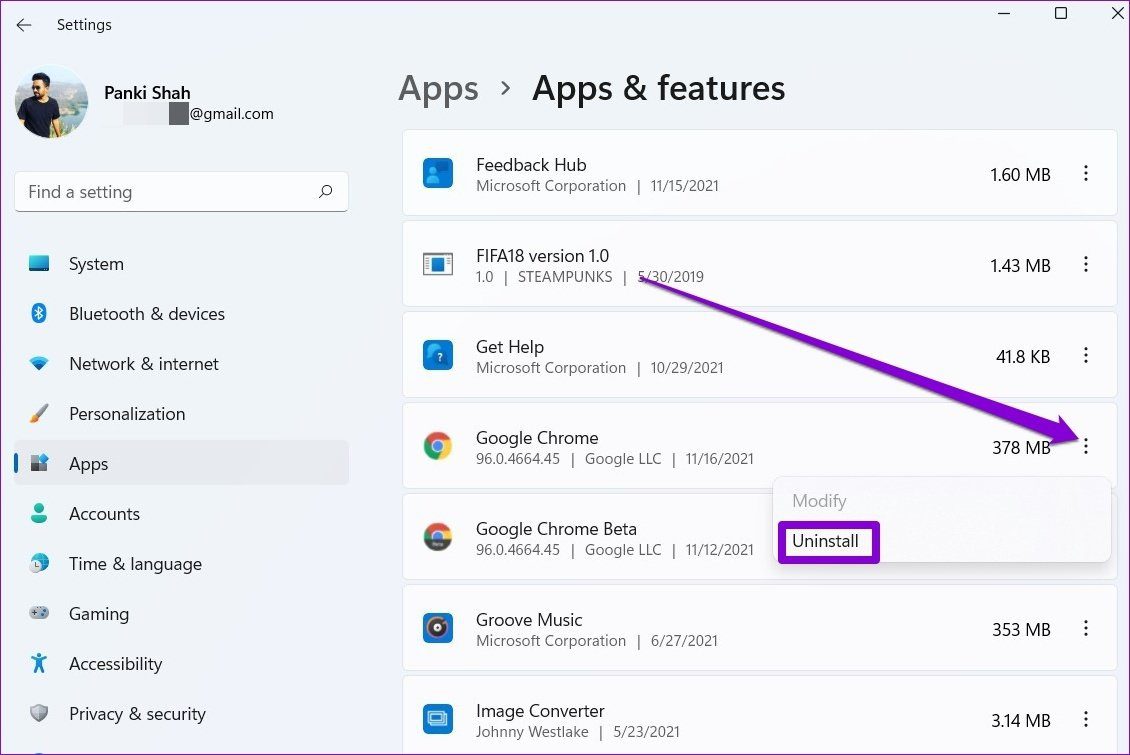
Step 1: Press Windows key + I to launch the Settings app and use the left pane to navigate to the Apps tab. Now click on Apps & features.

Step 2: Scroll down to find Google Chrome. Click on the three-dot menu and select Uninstall option.
Now restart your PC and install Google Chrome again.
The Wait Is Over
The cache is a crucial element for any web browser. Without it, web browsers can’t achieve lighting fast loading times. In most cases, the issue occurs due to corrupted cache data or misconfigured settings. Rest assured, once you go through the above solutions, the error should be resolved.
Last updated on 05 February, 2022
The above article may contain affiliate links which help support Guiding Tech. However, it does not affect our editorial integrity. The content remains unbiased and authentic.
Read Next
 7 Best Ways to Fix Gmail Waiting for Sync Error
While Slack and other business messaging apps have reduced the amount of time we used to spend on Gmail, it's still important.
7 Best Ways to Fix Gmail Waiting for Sync Error
While Slack and other business messaging apps have reduced the amount of time we used to spend on Gmail, it's still important.
 Top 2 Ways to Fix Waiting for This Message Error on WhatsApp
We've all been there.
Top 2 Ways to Fix Waiting for This Message Error on WhatsApp
We've all been there.
 Top 8 Ways to Fix Google Drive Waiting to Upload Error
Quite often you would select a bunch of files for uploading them to Google Drive on your phone.
Top 8 Ways to Fix Google Drive Waiting to Upload Error
Quite often you would select a bunch of files for uploading them to Google Drive on your phone.
 Top 10 Ways to Fix App Store Waiting for Download Error on iPhone
The App Store is the only destination to download apps for iPhones and iPads, unlike the Play Store.
Top 10 Ways to Fix App Store Waiting for Download Error on iPhone
The App Store is the only destination to download apps for iPhones and iPads, unlike the Play Store.
 Top 9 Ways to Fix Google Chrome Stuck on Waiting to Download Issue
We usually joke about the fact that everyone uses Internet Explorer or its upgraded version Microsoft Edge Browser to install Google Chrome only.
Top 9 Ways to Fix Google Chrome Stuck on Waiting to Download Issue
We usually joke about the fact that everyone uses Internet Explorer or its upgraded version Microsoft Edge Browser to install Google Chrome only.
 How to Fix iTunes Is Waiting for Windows Update Error
When I connect my iPhone to a PC, the last thing I want to see is a lengthy error message.
How to Fix iTunes Is Waiting for Windows Update Error
When I connect my iPhone to a PC, the last thing I want to see is a lengthy error message.
 Top 15 Ways to Fix Google Play Store Stuck at Waiting for Download Issue
Whether you are installing multiple apps on your Android or updating them through the Google Play Store, the process is slow.
Top 15 Ways to Fix Google Play Store Stuck at Waiting for Download Issue
Whether you are installing multiple apps on your Android or updating them through the Google Play Store, the process is slow.
 How to Fix Facebook Messenger Waiting for Network Issue (Android)
Facebook app had its Messenger built inside.
How to Fix Facebook Messenger Waiting for Network Issue (Android)
Facebook app had its Messenger built inside.
DID YOU KNOW
The first animated Google Doodle was made in honor of Sir Isaac Newton.


“Enable write caching on the device” on the disk level has absolutely nothing to do with Chrome’s cache.
It’s an entirely separate cache that is used for all applications writing to that drive and can speed up writes to that drive by storing data in memory before the drive writes the data to the disk in the background while the application has already gone on to something else.
Turning off this cache will actually make all applications — including Chrome — slower.