After months of beta testing with selected users, Microsoft’s latest take on Canva and Adobe Express is finally here. Unlike its rivals, Microsoft Designer is heavily banking on AI to win over users.

Available for Microsoft 365 subscribers, here are the best Microsoft Designer tips and tricks to get started.
What Is Microsoft Designer
Microsoft Designer is the newest graphic design tool on the market. With Designer, you can create stunning graphic designs in no time. Whether you are a beginner or a pro, there is something for everyone to create eye-catching designs for social media accounts, businesses, startups, or personal use.
Microsoft Designer is a part of the Microsoft 365 subscription. Aside from bundling productivity apps like Word and Excel, a Microsoft 365 plan also offers more features in Clipchamp video editor and access to Microsoft Designer.
The company is leveraging DALL-E2 by OpenAI to create realistic photos and artwork based on your description. You can always use your own images or create a design from scratch with several editing tools. Like Clipchamp, Microsoft Designer is available as free software to Microsoft 365 subscribers with optional premium features.
1. Ask Designer to Create a Design
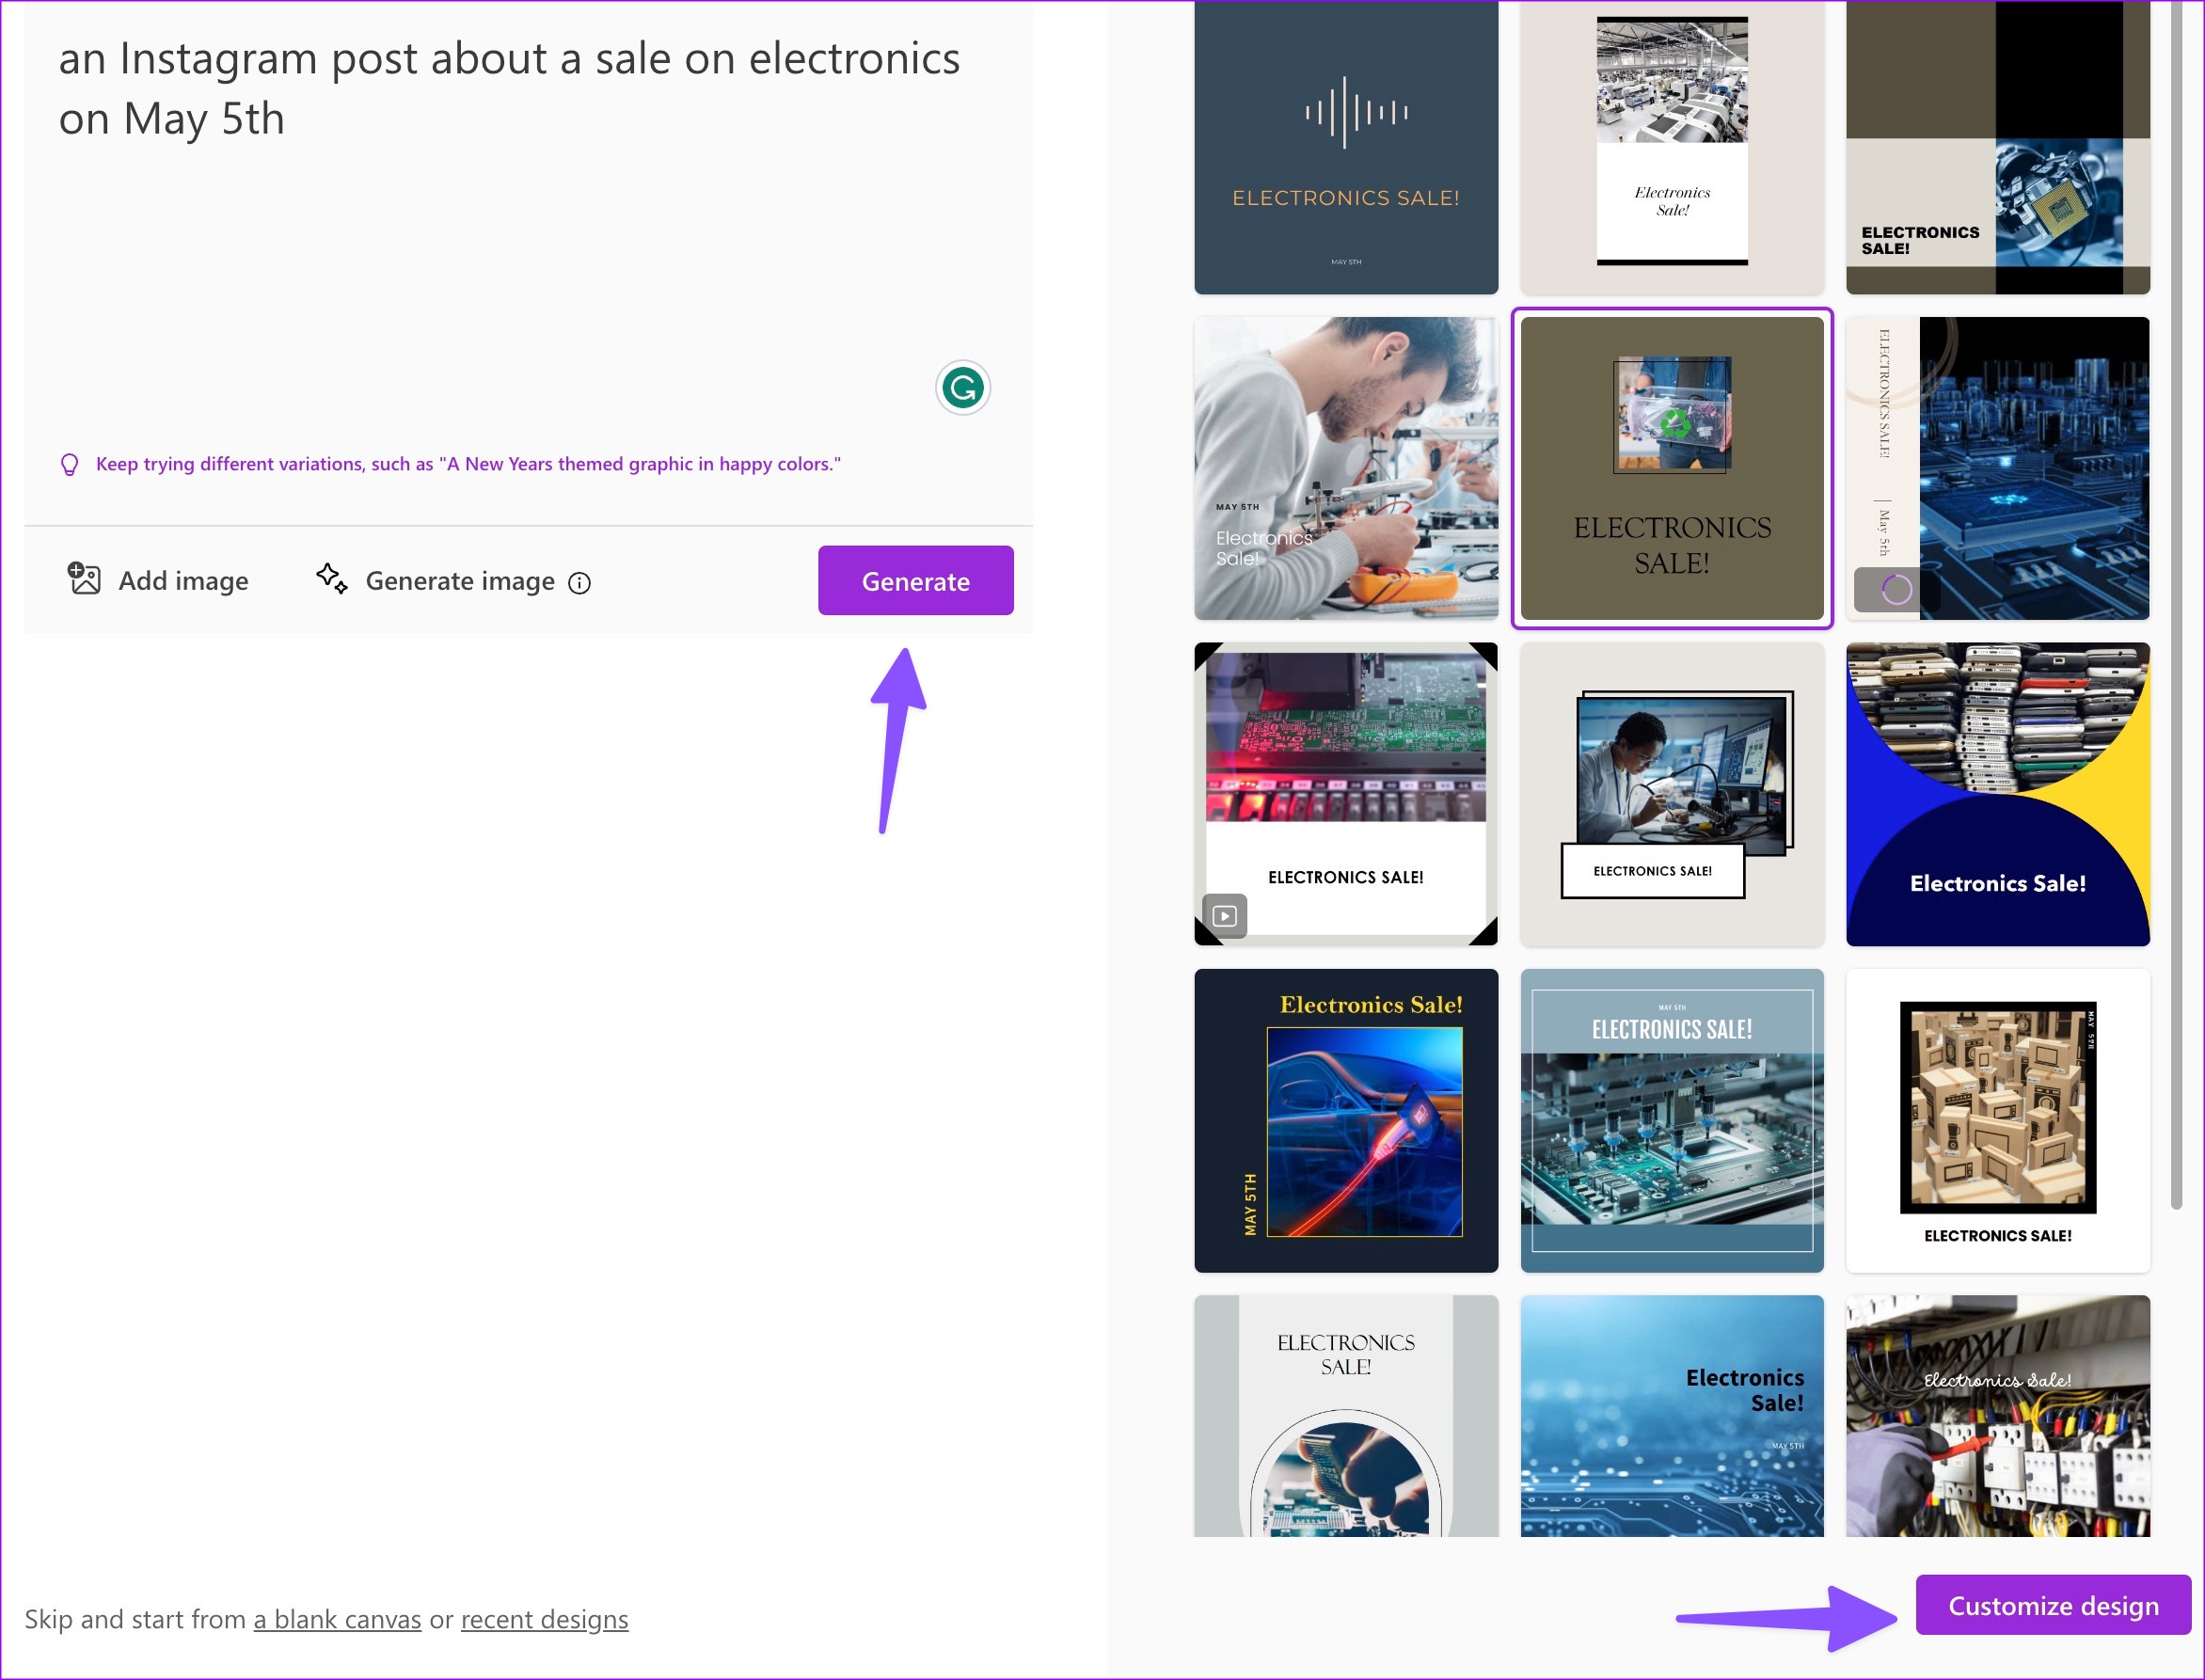
Microsoft is taking a unique approach with Designer. You can sign in with your Microsoft 365 account and check the home page that asks to describe the design you would like to create.
We asked it to create an Instagram post about a sale on electronics on May 5 and hit the Generate button. Designer quickly created several pictures and videos with relevant details. You can pick your favorite design and start customizing it to your preference.
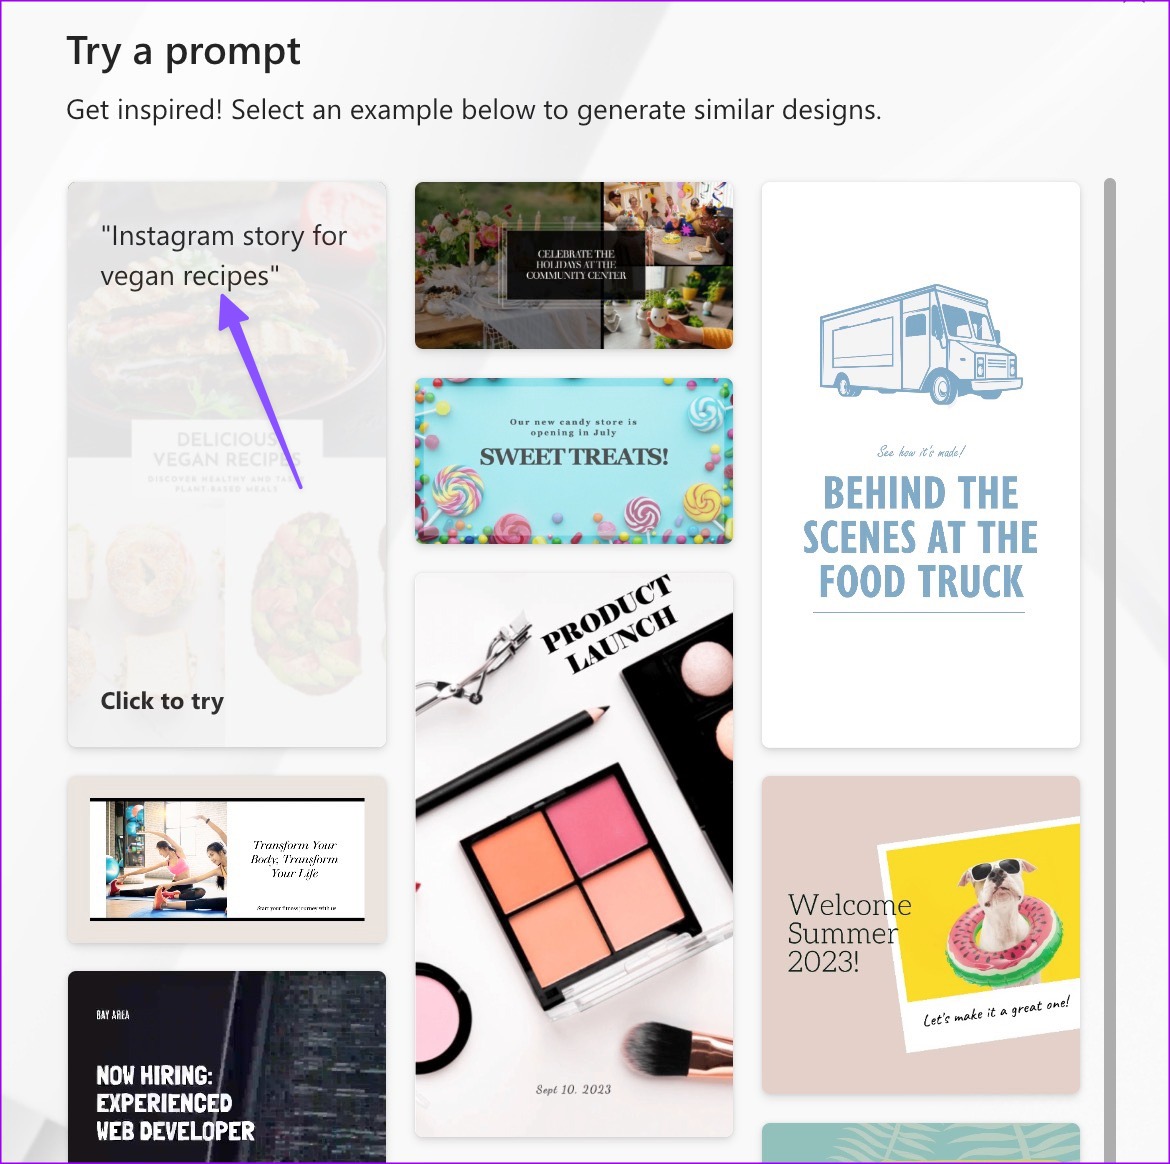
2. Try a Prompt
You can check several ready-to-use examples in Microsoft Designer to get some inspiration. You can hover the cursor over a design and check prompts. You’ll need to check several prompts to get an idea about writing a description in Designer.
3. Generate an Image Using the Description
Do you want to generate an image using a description? You can easily do so in Microsoft Designer.
Step 1: Head to Microsoft Designer home and click Generate image.

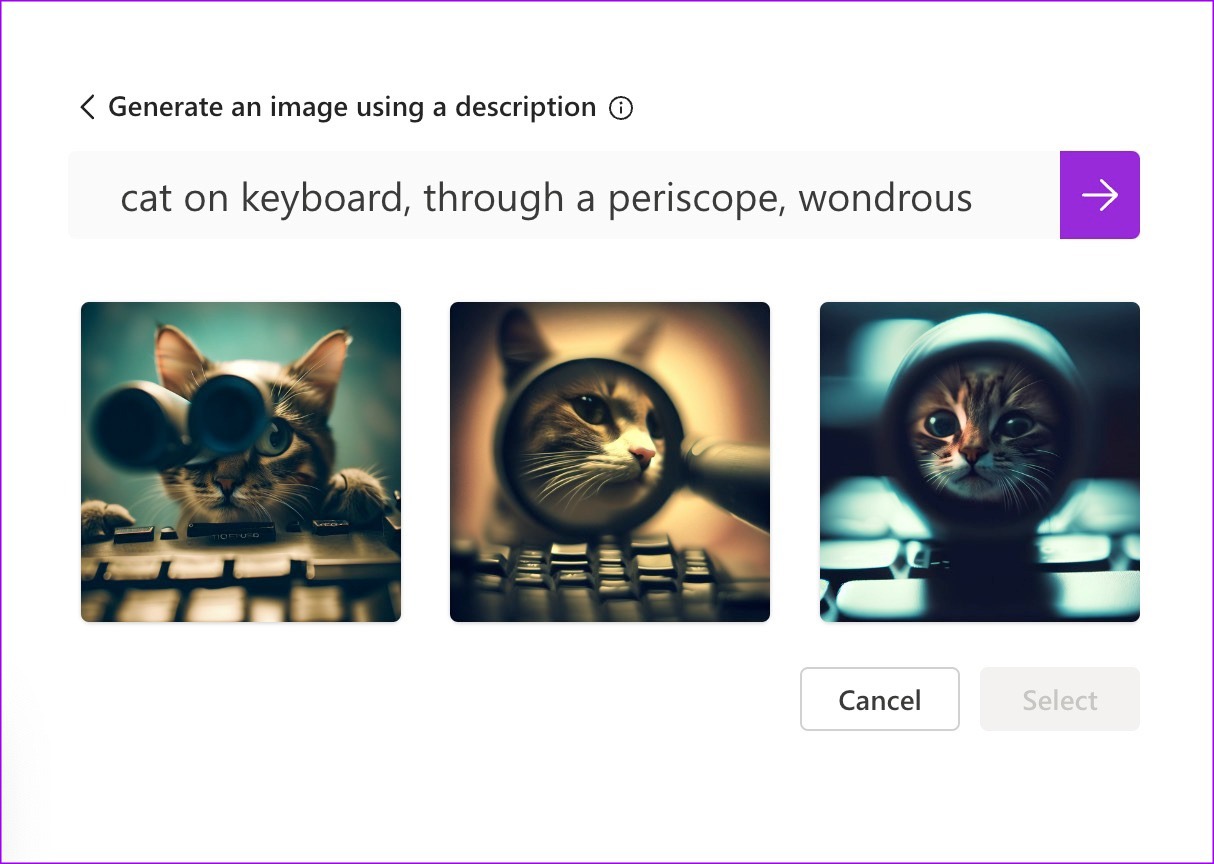
Step 2: You can check some prompts to get inspiration. Write the image description and click the arrow icon.
Here is what the app came up with when we wrote ‘cat on keyboard, through a periscope, wondrous’ as a description in Designer. Quite astute, isn’t it? Select an image, check ready-to-use templates with the picture and description, and start customizing the design.
You can also import an image from the desktop and enter text to review design ideas.
4. Start With a Blank Canvas
If you don’t want AI help, you can always start with a blank canvas in Designer. You can click ‘blank canvas’ at the bottom and pick an appropriate size for your Instagram posts, Facebook ads, and stories.
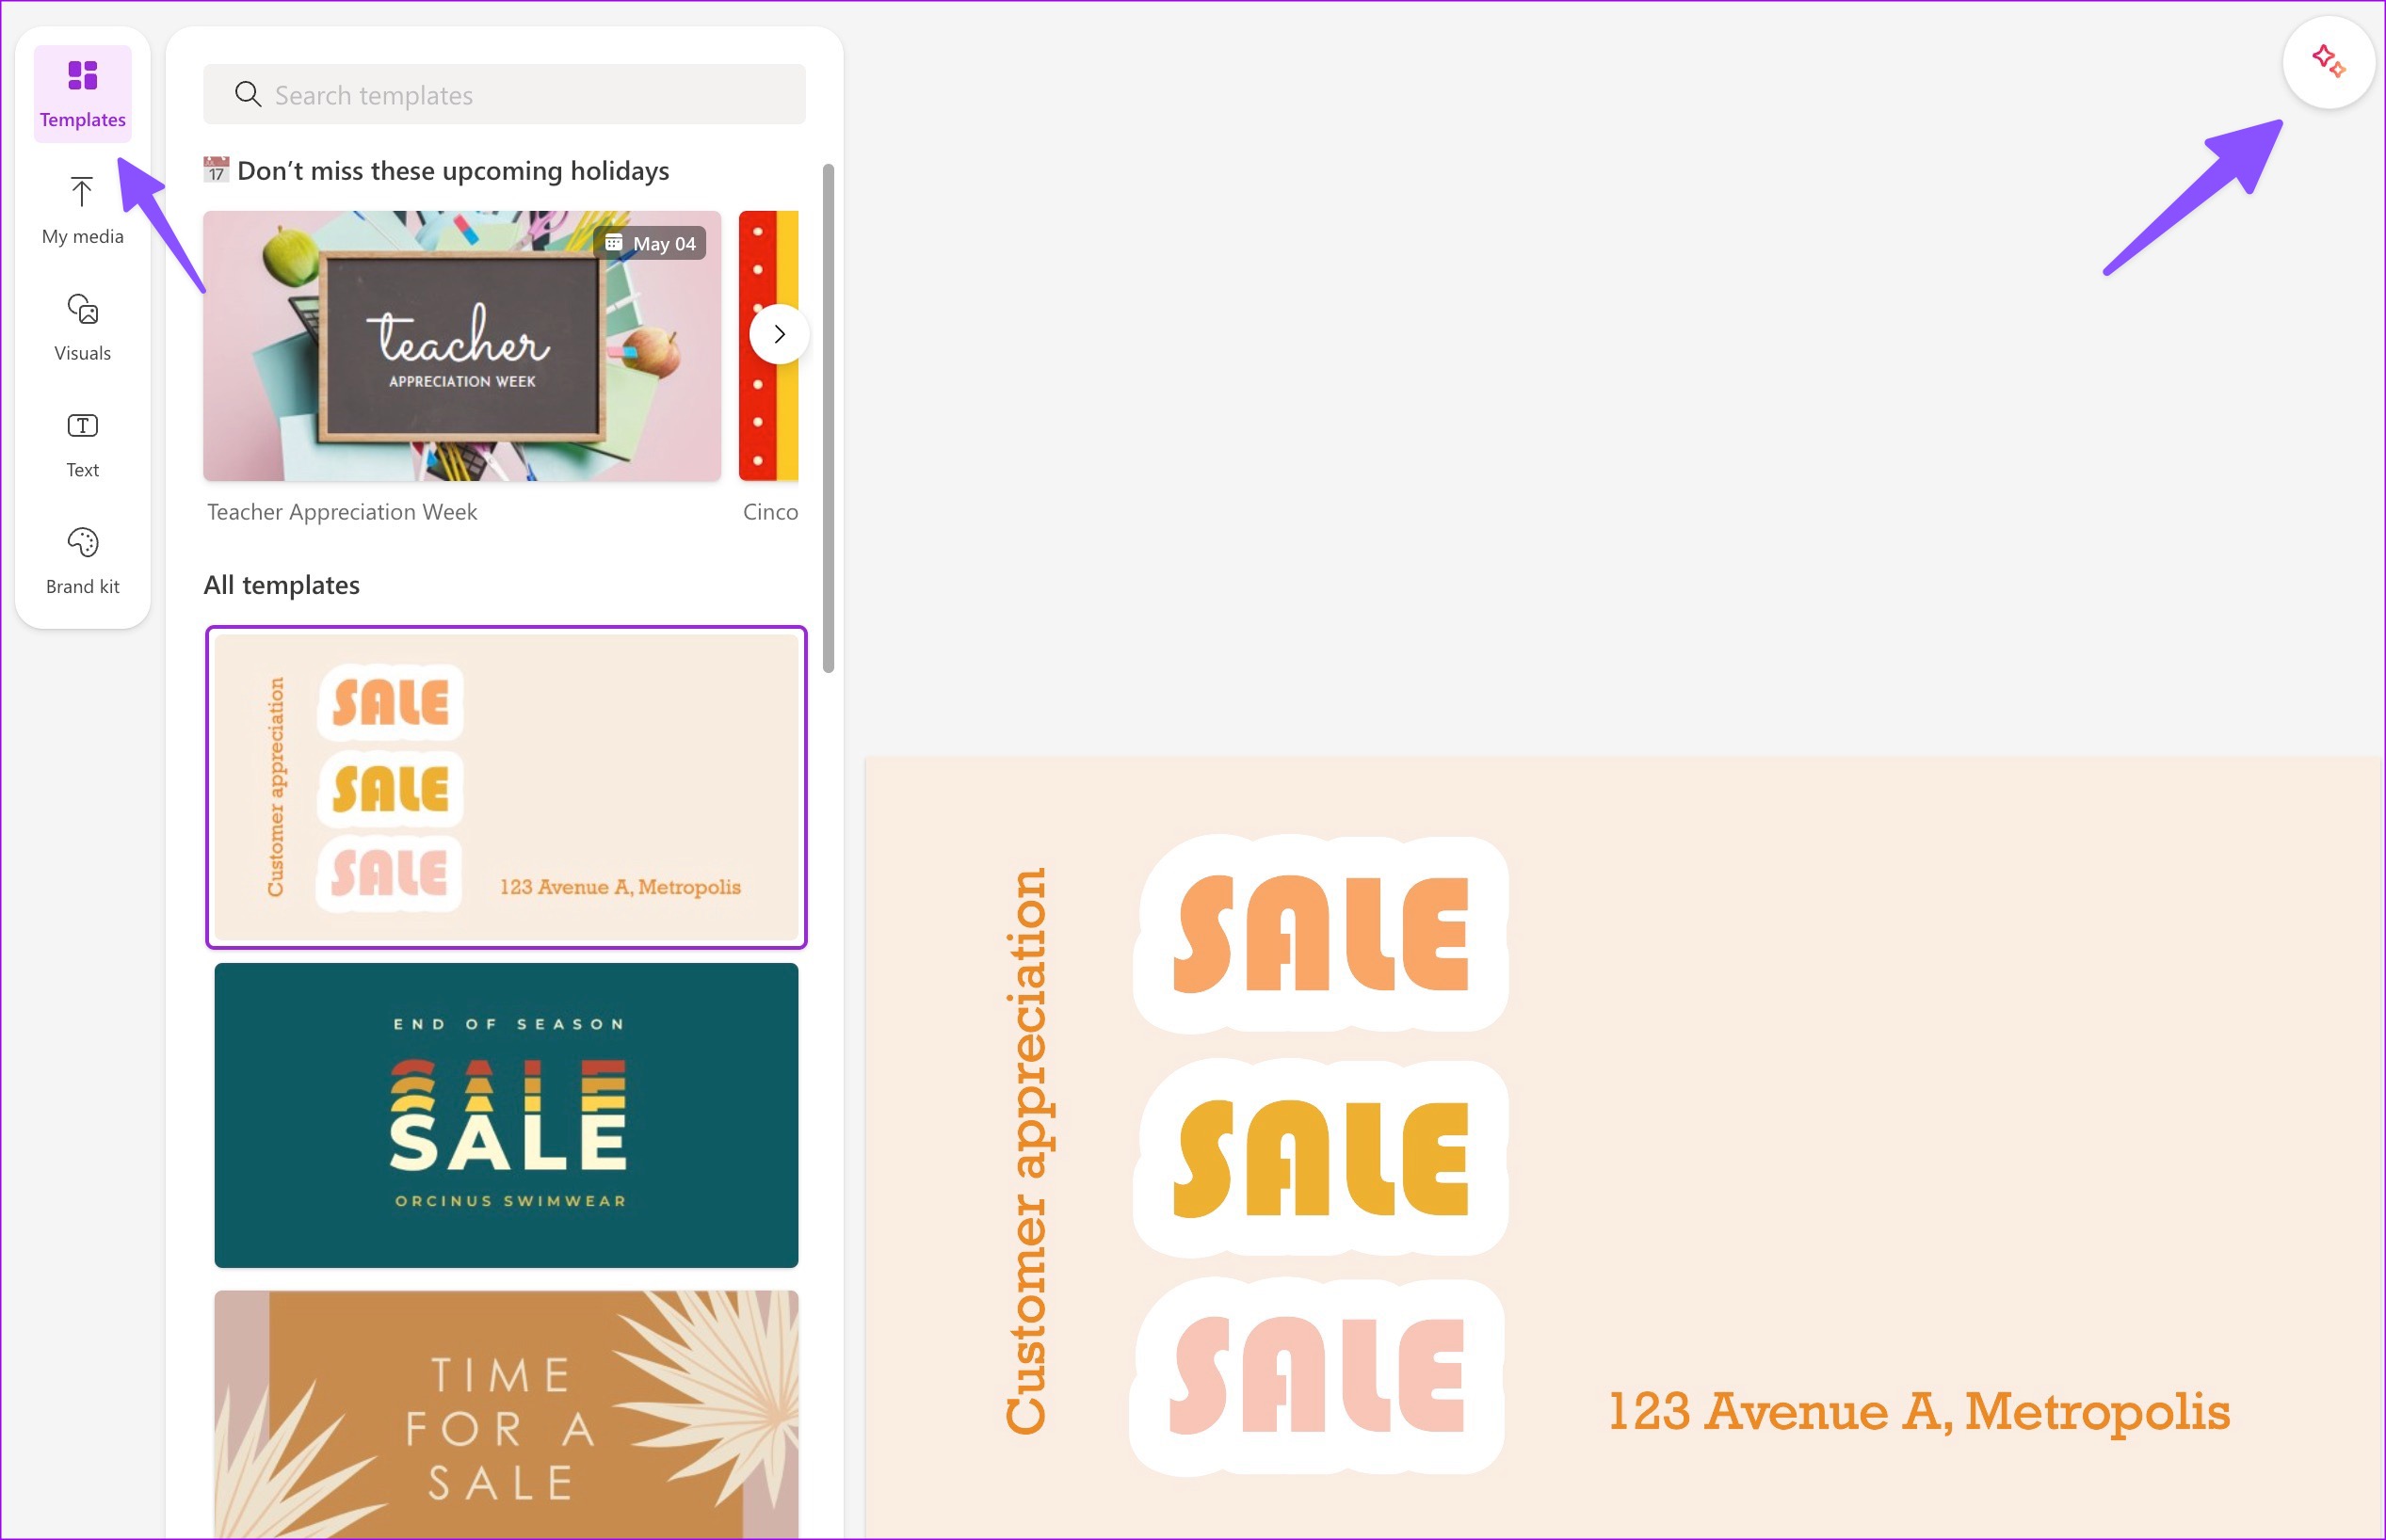
5. Check Templates and Design Ideas
You can check some ready-to-use templates based on your canvas size. Unfortunately, the template gallery is slim compared to rivals and is not categorized. You must use the search bar at the top to find a relevant template.
Once you select a template, click the Ideas button to review similar designs.
6. Check Visuals
Microsoft Designer has a rich library of photos, videos, and graphics for your design. You can select Visuals from the sidebar and check stock photos, videos, illustrations, icons, frames, shapes, and more.

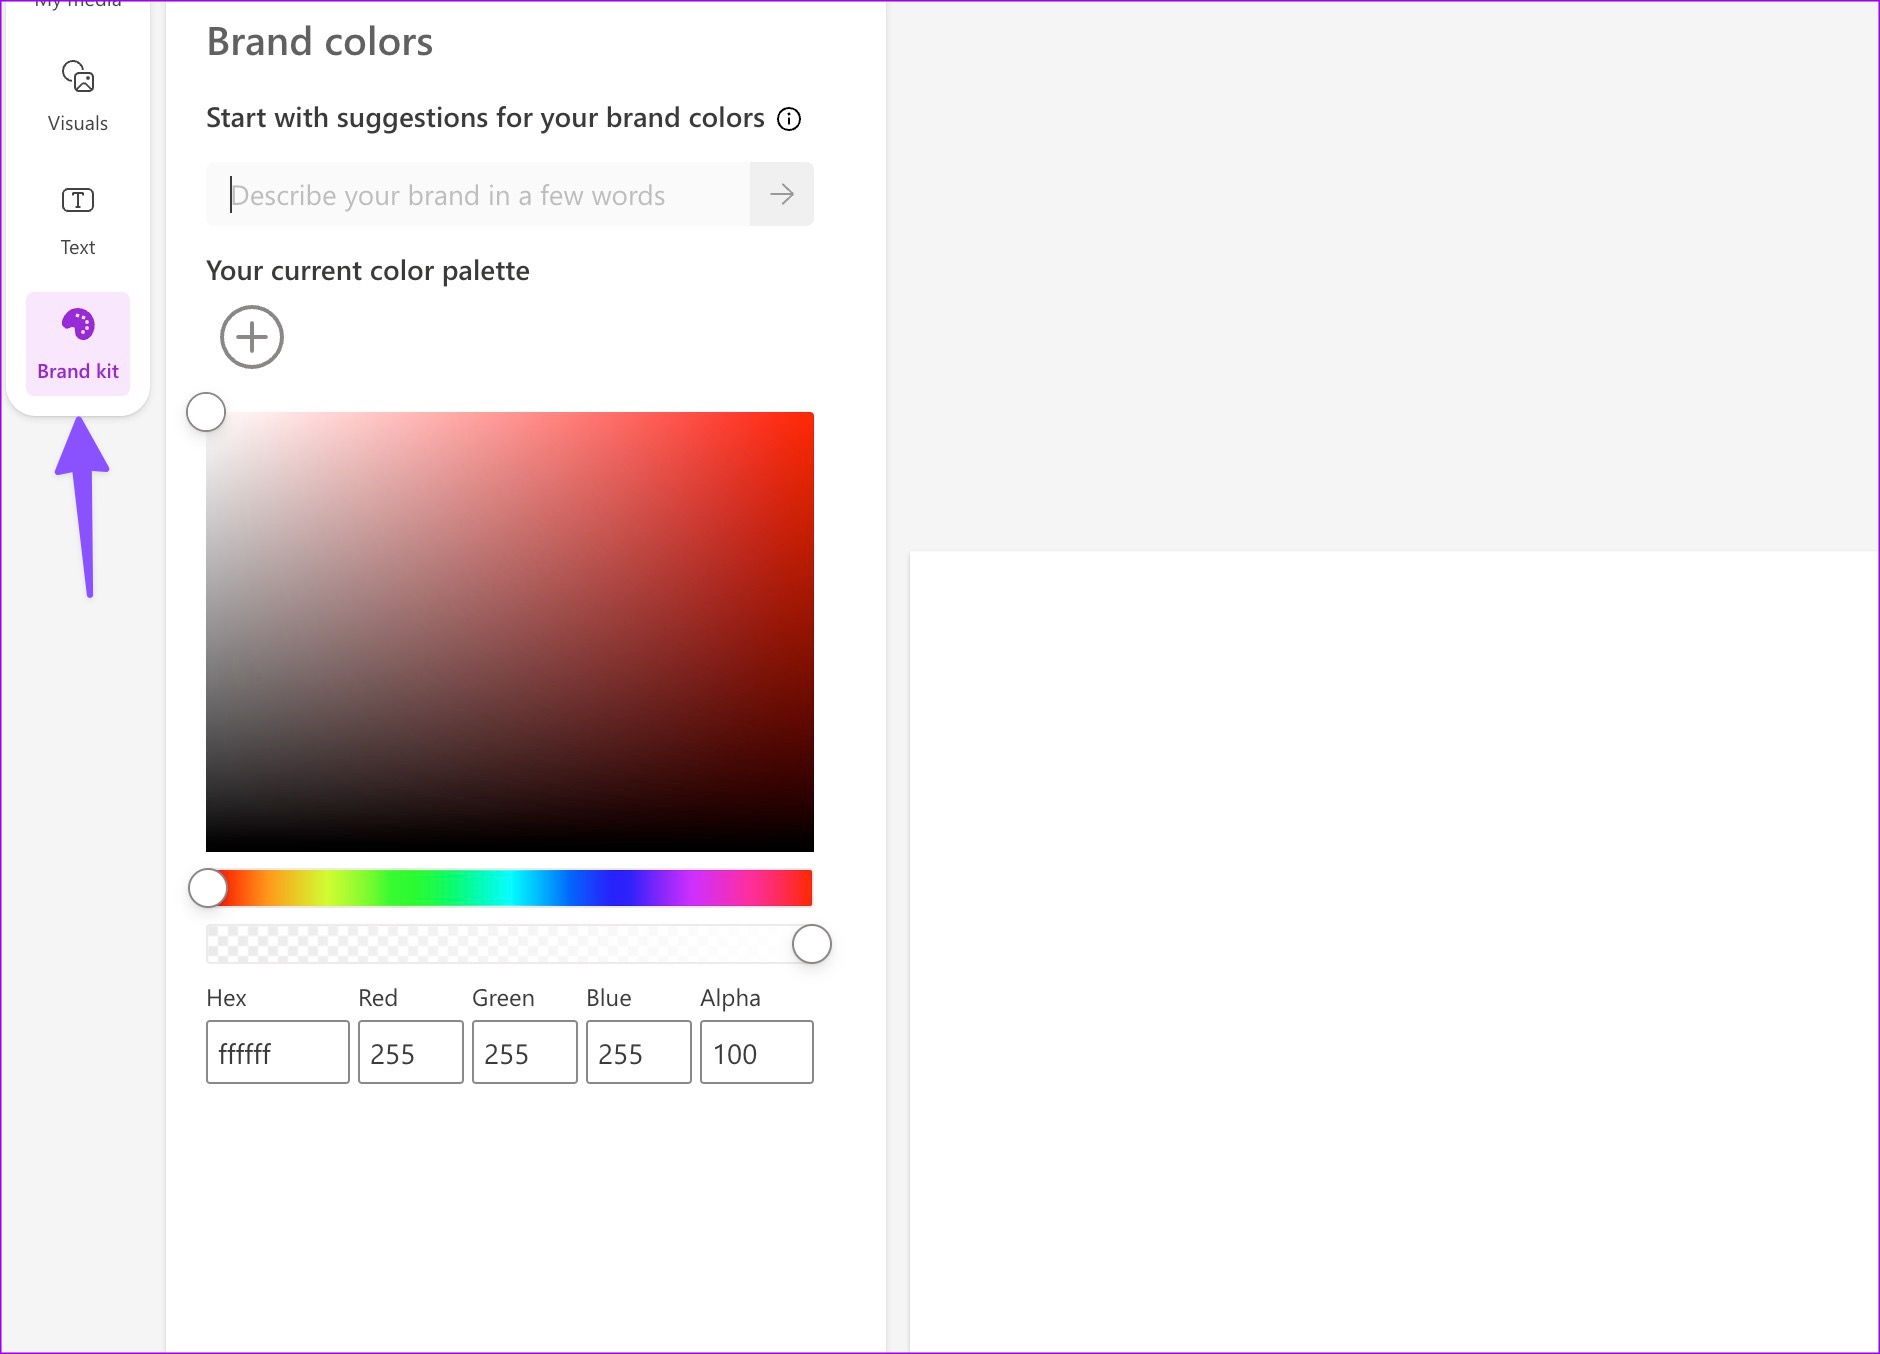
7. Create a Brand Kit
You can create a brand kit in Microsoft Designer and ensure all your designs look and feel the same and match your company personality. You can move to the Brand kit tab and pick from several options.
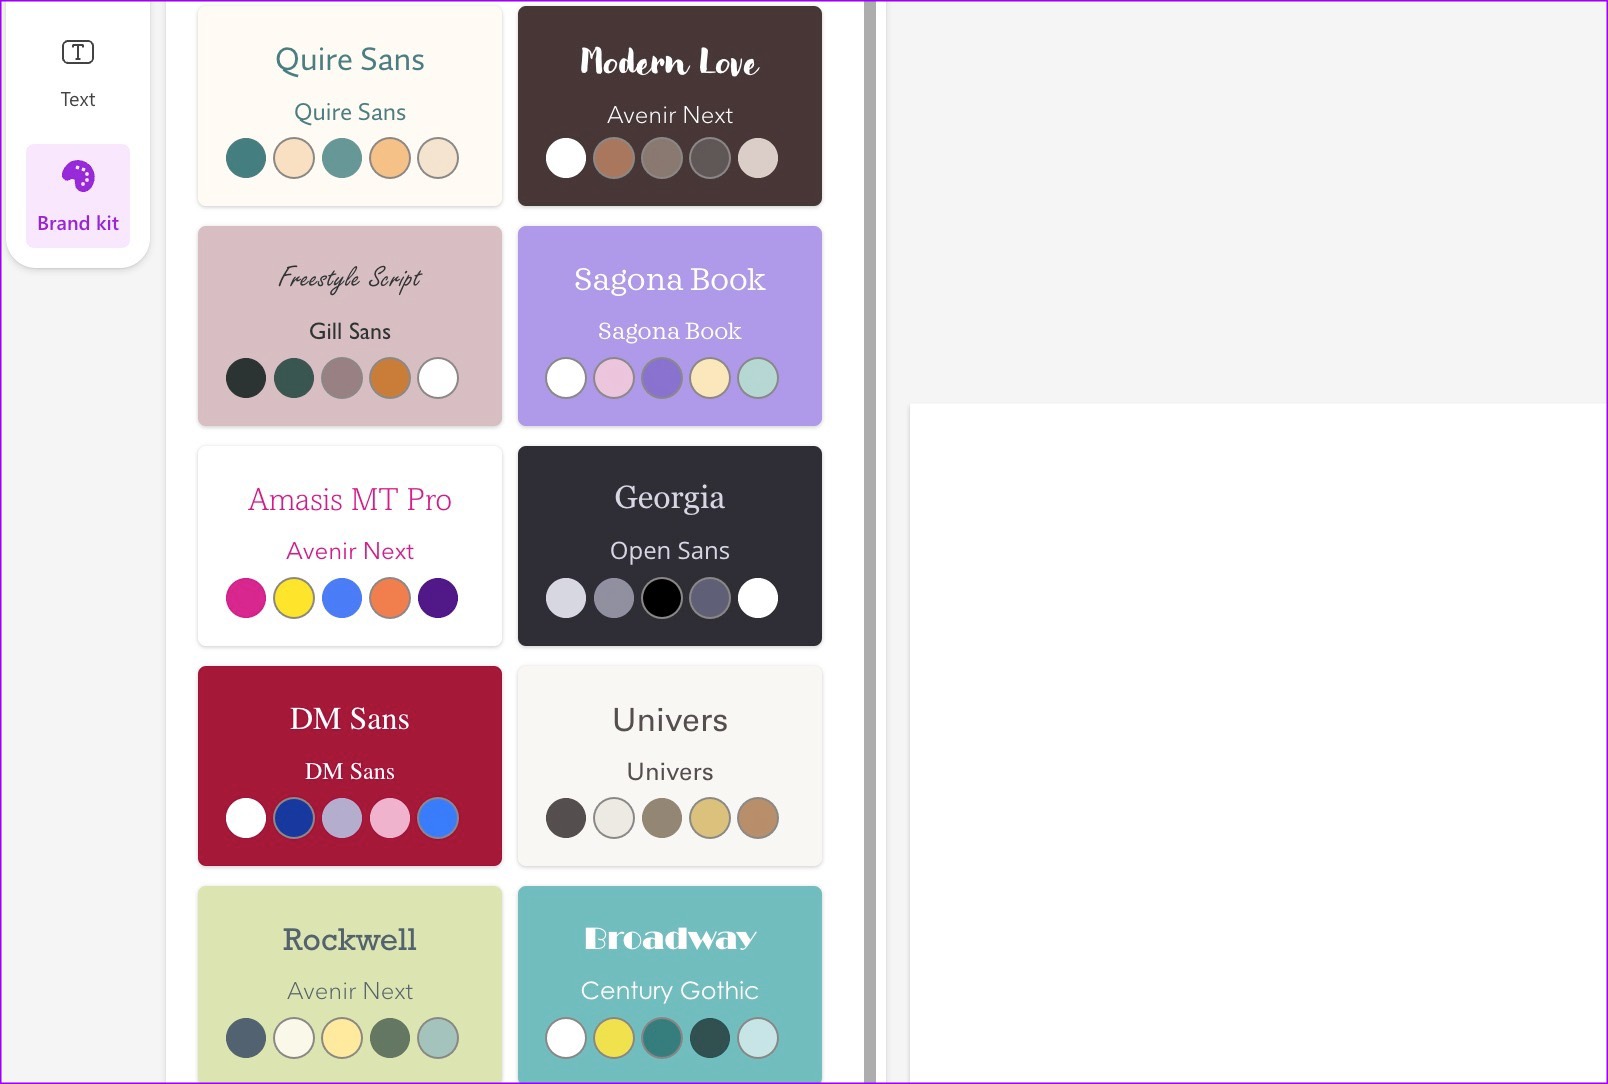
You can also create a brand kit by selecting a heading, subheading, body text type, and color palette.
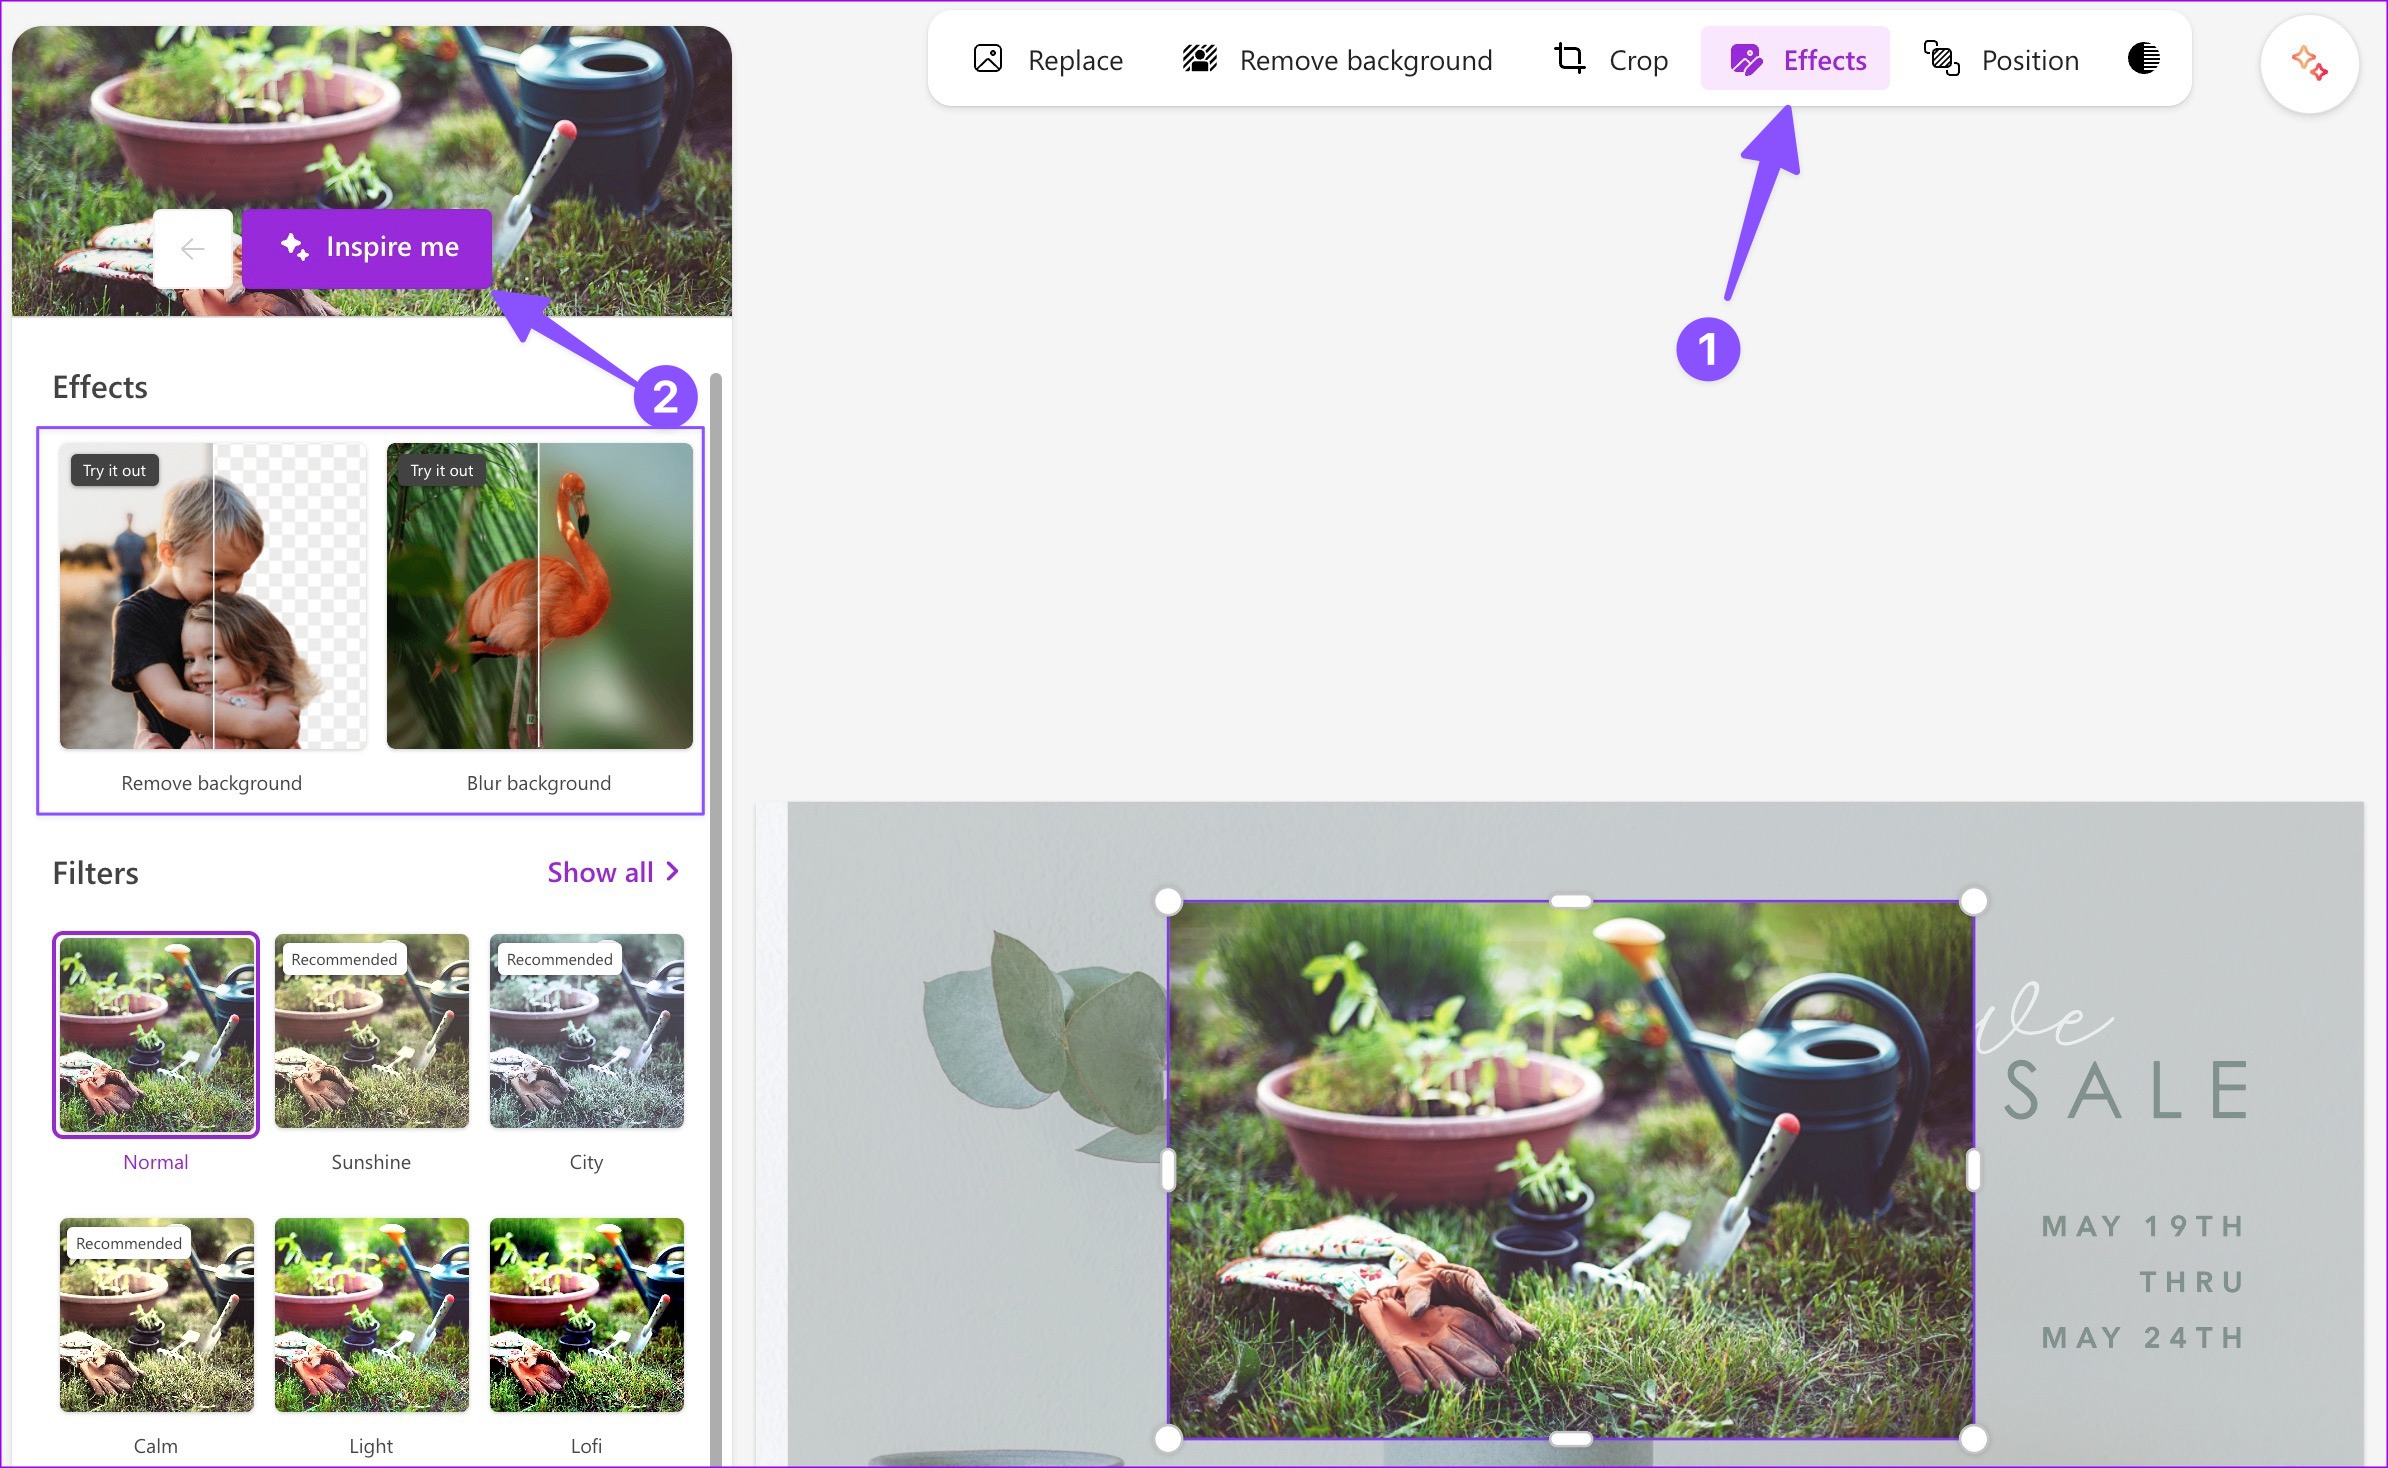
8. Check AI Effects in Images
Instead of endlessly tweaking a picture’s brightness, contrast, saturation, temperature, and sharpness, you can click the Effects button at the top and hit ‘Inspire me’ to apply the AI touch to it. It automatically adjusts the relevant options and tweaks the image look. You can also remove the picture background or blur the background from the same menu.
9. Connect Your Social Media Accounts
You can post your designs to multiple social media accounts in one click. After making all the relevant tweaks and changes, hit the Download button at the top and link your LinkedIn, Instagram Business, and Facebook Page to it.
10. Send Your Design to Phone
You can easily send your design from the desktop to the phone. Here’s how.
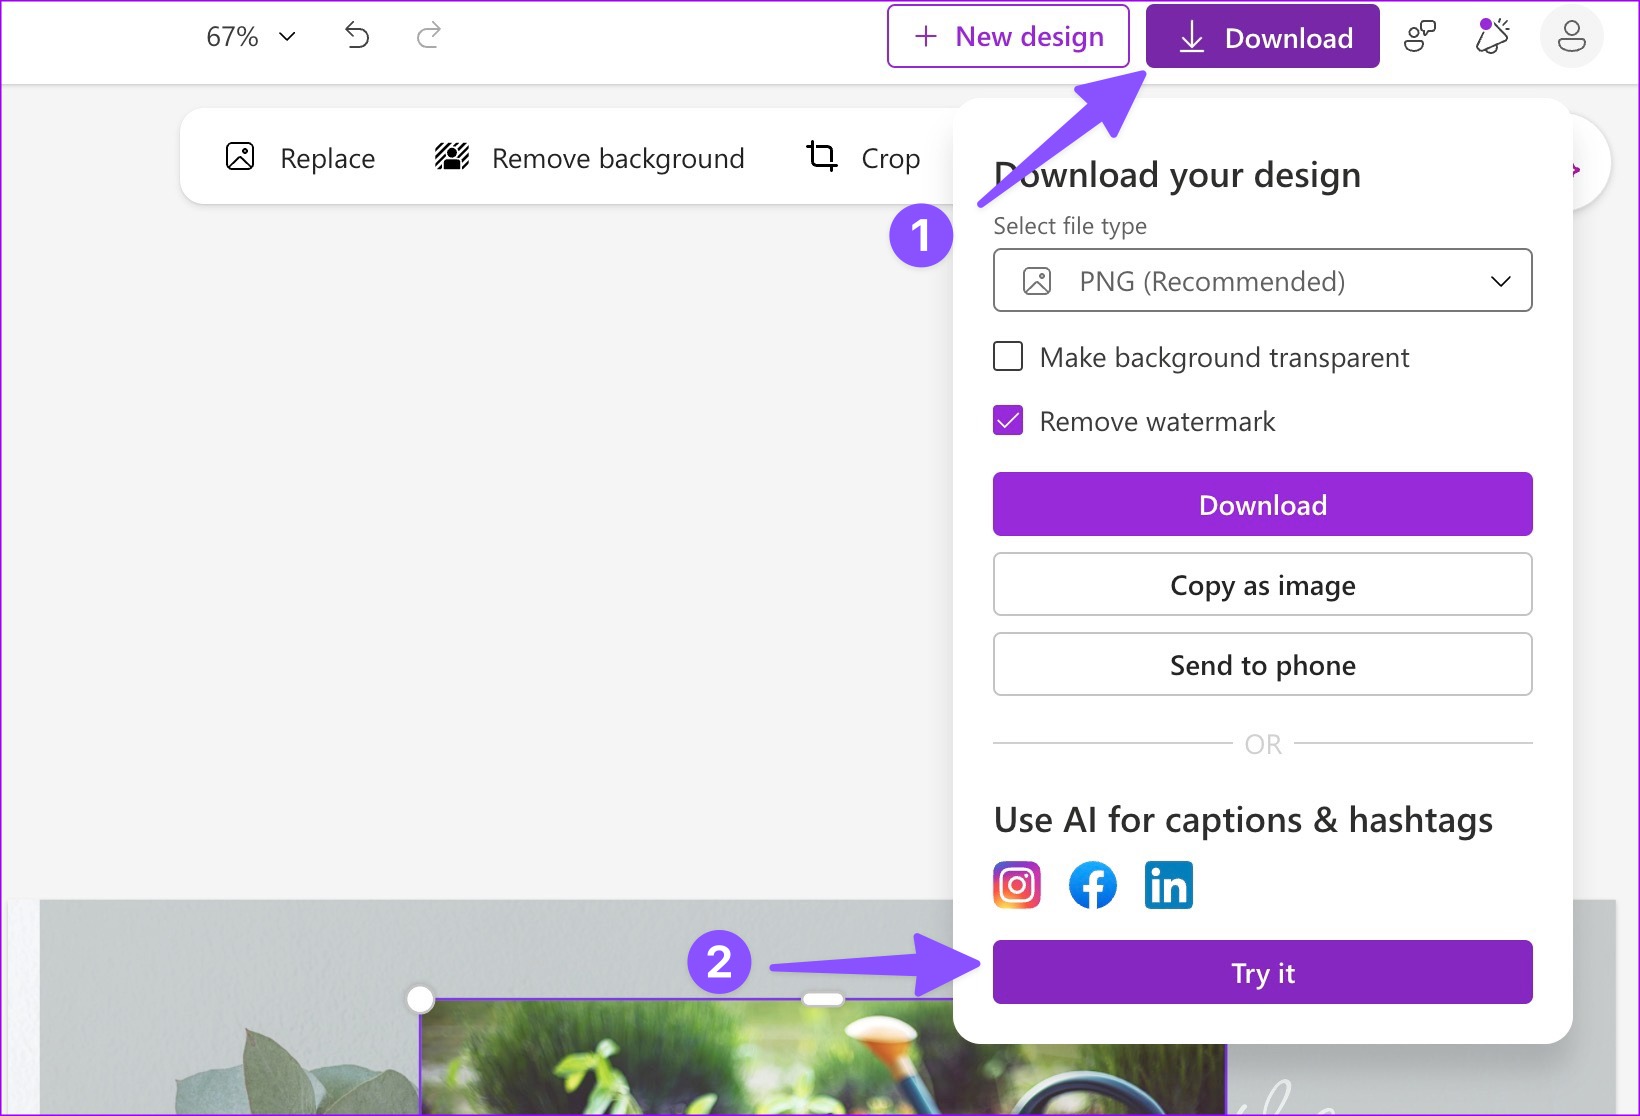
Step 1: After your design is ready, click Download at the top-right corner.

Step 2: Select Send to phone. Microsoft Designer generates a QR code.
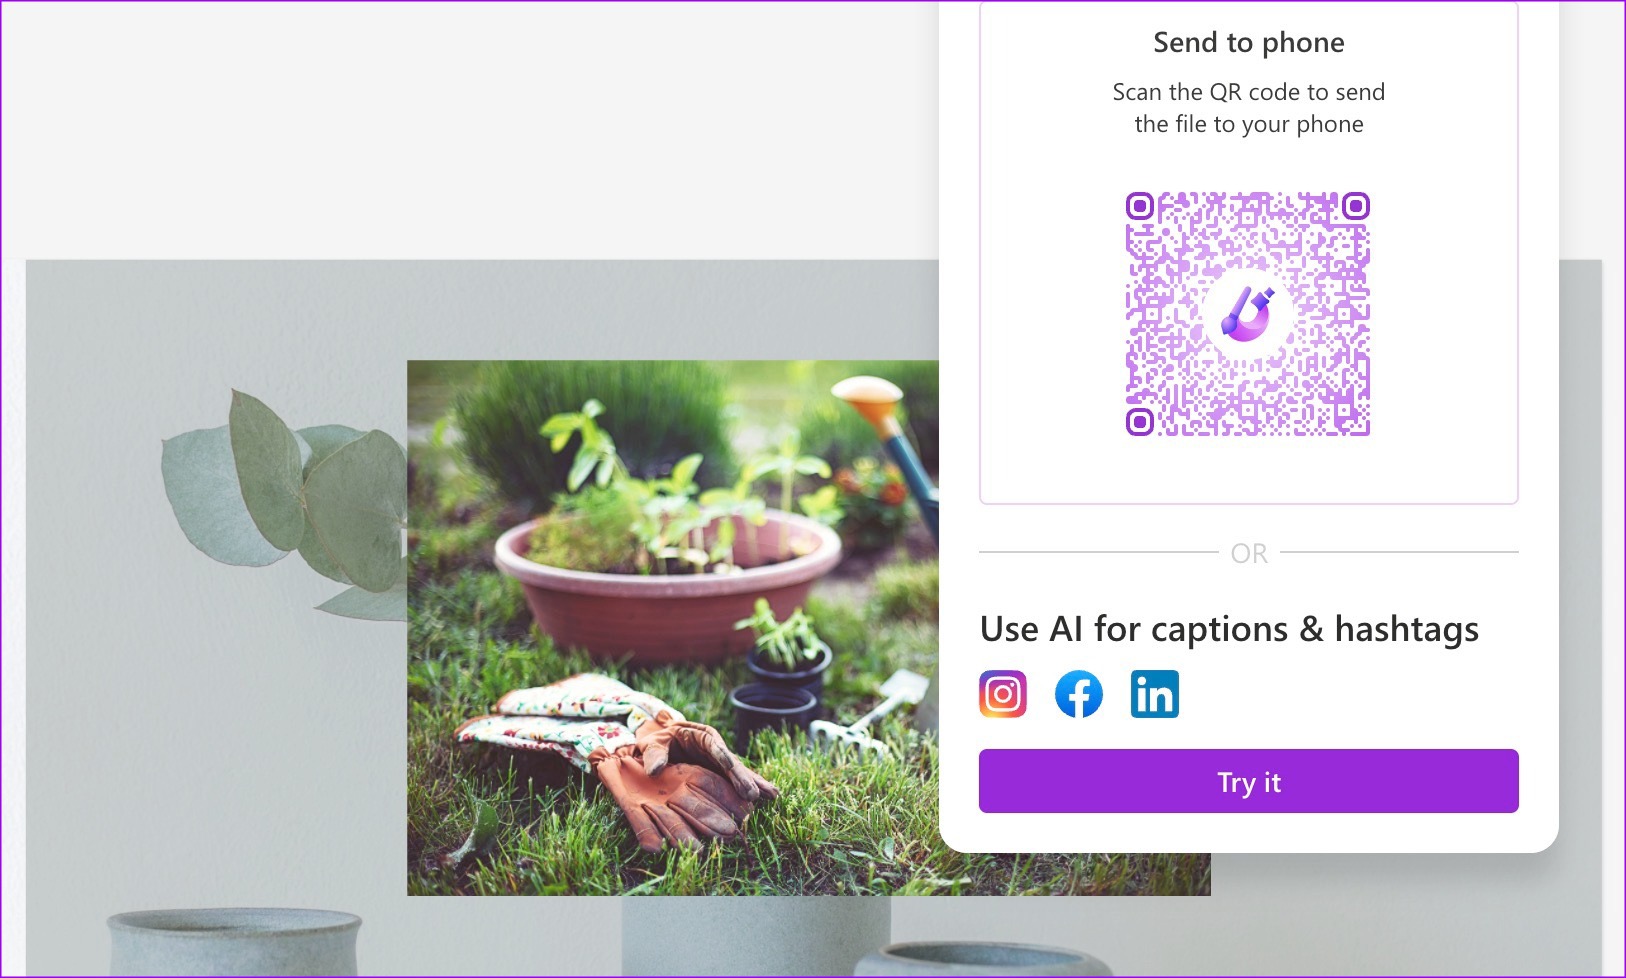
You can use your iPhone or Android phone to scan the QR code and receive the file.
Unleash Your Creativity
Microsoft also plans to integrate Designer with the Edge browser in future updates. Designer is a solid start from the company. We can’t wait to see how Microsoft improves it with more features in the coming months. Share your experience with Microsoft Designer in the comments below.
Last updated on 08 May, 2023
The above article may contain affiliate links which help support Guiding Tech. However, it does not affect our editorial integrity. The content remains unbiased and authentic.
Read Next
 12 Best Adobe XD Plugins for Every Designer
There was a time when we used to rely on Adobe Photoshop for every design-related requirement.
12 Best Adobe XD Plugins for Every Designer
There was a time when we used to rely on Adobe Photoshop for every design-related requirement.
 How to Make Diagrams On Windows Easily Using Diagram Designer
Flowcharts are examples of diagrams that are the easiest to create but have great significance when they manage to do what they do.
How to Make Diagrams On Windows Easily Using Diagram Designer
Flowcharts are examples of diagrams that are the easiest to create but have great significance when they manage to do what they do.
 6 Best Microsoft Outlook Calendar Tips & Tricks to Manage It Better
The Microsoft Office Calendar is part of Microsoft 365 products and is not a stand-alone program.
6 Best Microsoft Outlook Calendar Tips & Tricks to Manage It Better
The Microsoft Office Calendar is part of Microsoft 365 products and is not a stand-alone program.
 Top 11 Microsoft Edge Chromium Browser Tips and Tricks
With the introduction of Windows 10, Microsoft announced a brand-new Project Spartan — Microsoft Edge browser.
Top 11 Microsoft Edge Chromium Browser Tips and Tricks
With the introduction of Windows 10, Microsoft announced a brand-new Project Spartan — Microsoft Edge browser.
 Top 12 Microsoft SMS Organizer Tips and Tricks
With the deluge of chat apps like WhatsApp, the SMS experienced a drastic downfall.
Top 12 Microsoft SMS Organizer Tips and Tricks
With the deluge of chat apps like WhatsApp, the SMS experienced a drastic downfall.
 12 Top Microsoft Launcher Tips & Tricks That You Should Know
Microsoft Launcher can be considered as one of the best alternatives to Google's own launcher.
12 Top Microsoft Launcher Tips & Tricks That You Should Know
Microsoft Launcher can be considered as one of the best alternatives to Google's own launcher.
 Top 29 Microsoft Whiteboard Tips & Tricks to Use It Like a Pro
With the recent Windows update, Microsoft has given a special place to its Whiteboard app.
Top 29 Microsoft Whiteboard Tips & Tricks to Use It Like a Pro
With the recent Windows update, Microsoft has given a special place to its Whiteboard app.
DID YOU KNOW
You can use the Chrome search bar as a calculator.

